
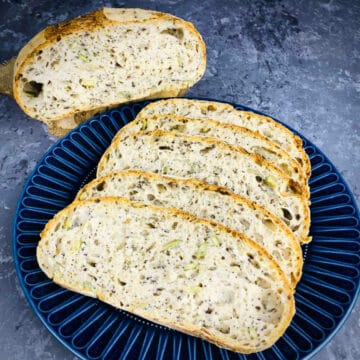
Indulge in the delicious goodness of seeded sourdough bread. With its irresistible golden crust, soft, chewy crumb, and a medley of seeds, this bread is a true delight for your taste buds.
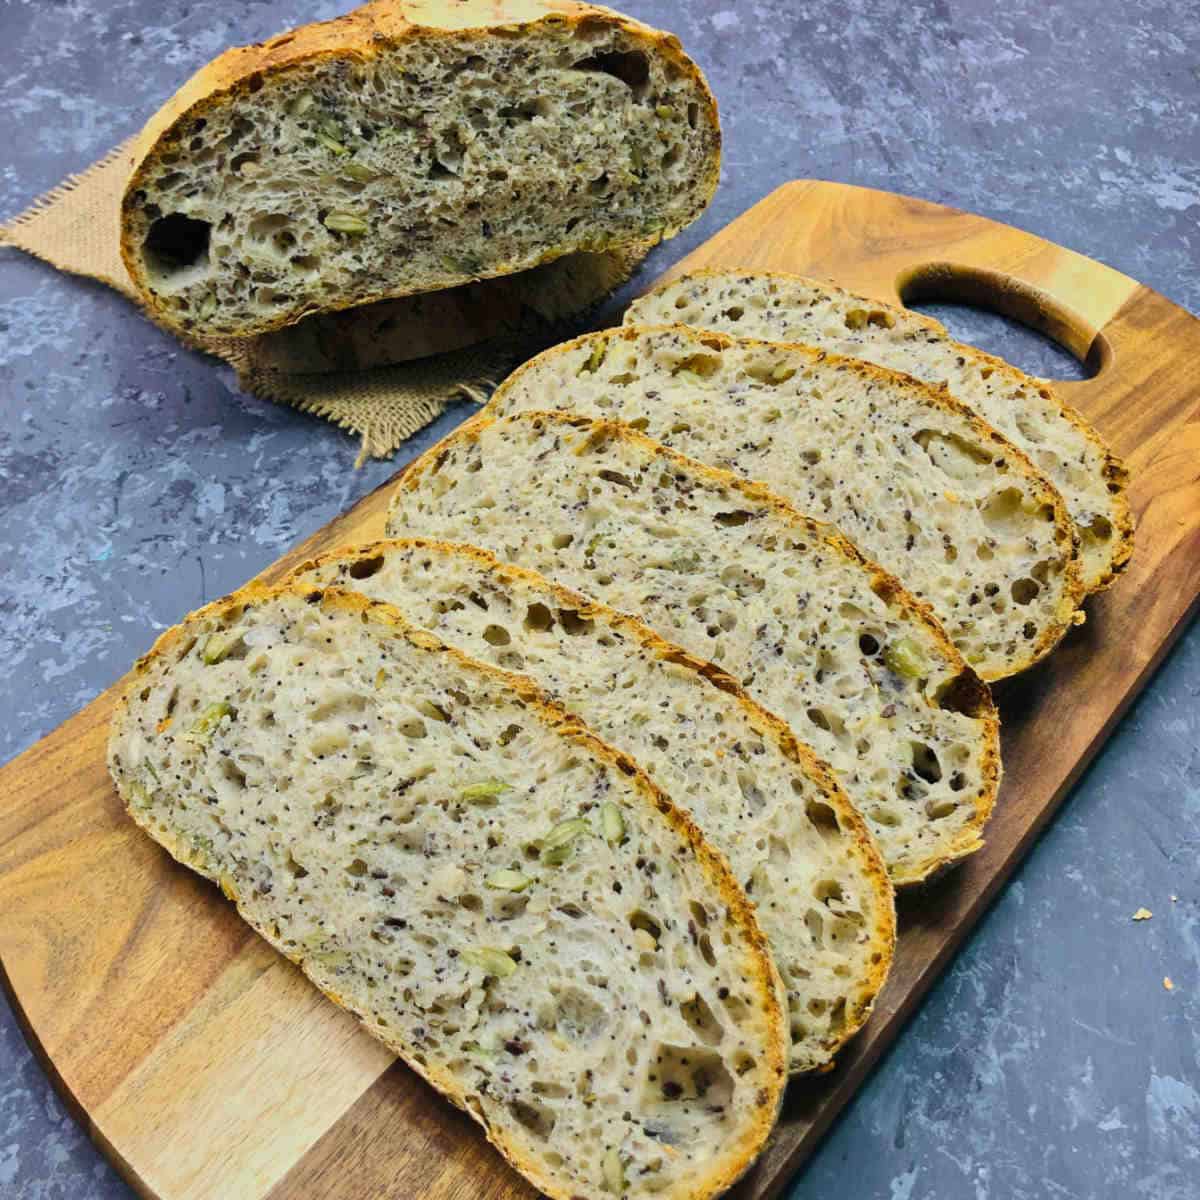
Seeded sourdough bread is a type of bread made with sourdough starter and enhanced with various seeds. Seeded sourdough bread typically has a hearty and nutty flavor due to the combination of sourdough fermentation and the seeds. The seeds also add a pleasant crunch and visual appeal to the bread.
This seeded sourdough bread recipe is a true family favorite, hands down. Not only is it a beloved choice for my son and me, but our whole family adores this bread. In fact, it has become my most frequently baked loaf long before it even made its appearance on my blog. This delicious and unique sourdough bread flavor is a must-try.
Why you will love this recipe?
- The combination of sourdough fermentation and seeds results in a unique and robust flavor profile. The seeds add a delightful crunch and texture to the bread, enhancing the overall eating experience.
- This sourdough seed bread is incredibly versatile. It can be enjoyed on its own, used for sandwiches, or paired with various spreads and dips.
Ingredients
Sourdough starter: Make sure the sourdough starter is active and bubbly.
Seeds: I have used equal quantities of sesame seeds, poppy seeds, flax seeds, pumpkin seeds, and sunflower seeds. You may use any seeds of your choice.
See the recipe card for full information on ingredients and quantities.
Step-by-step instructions
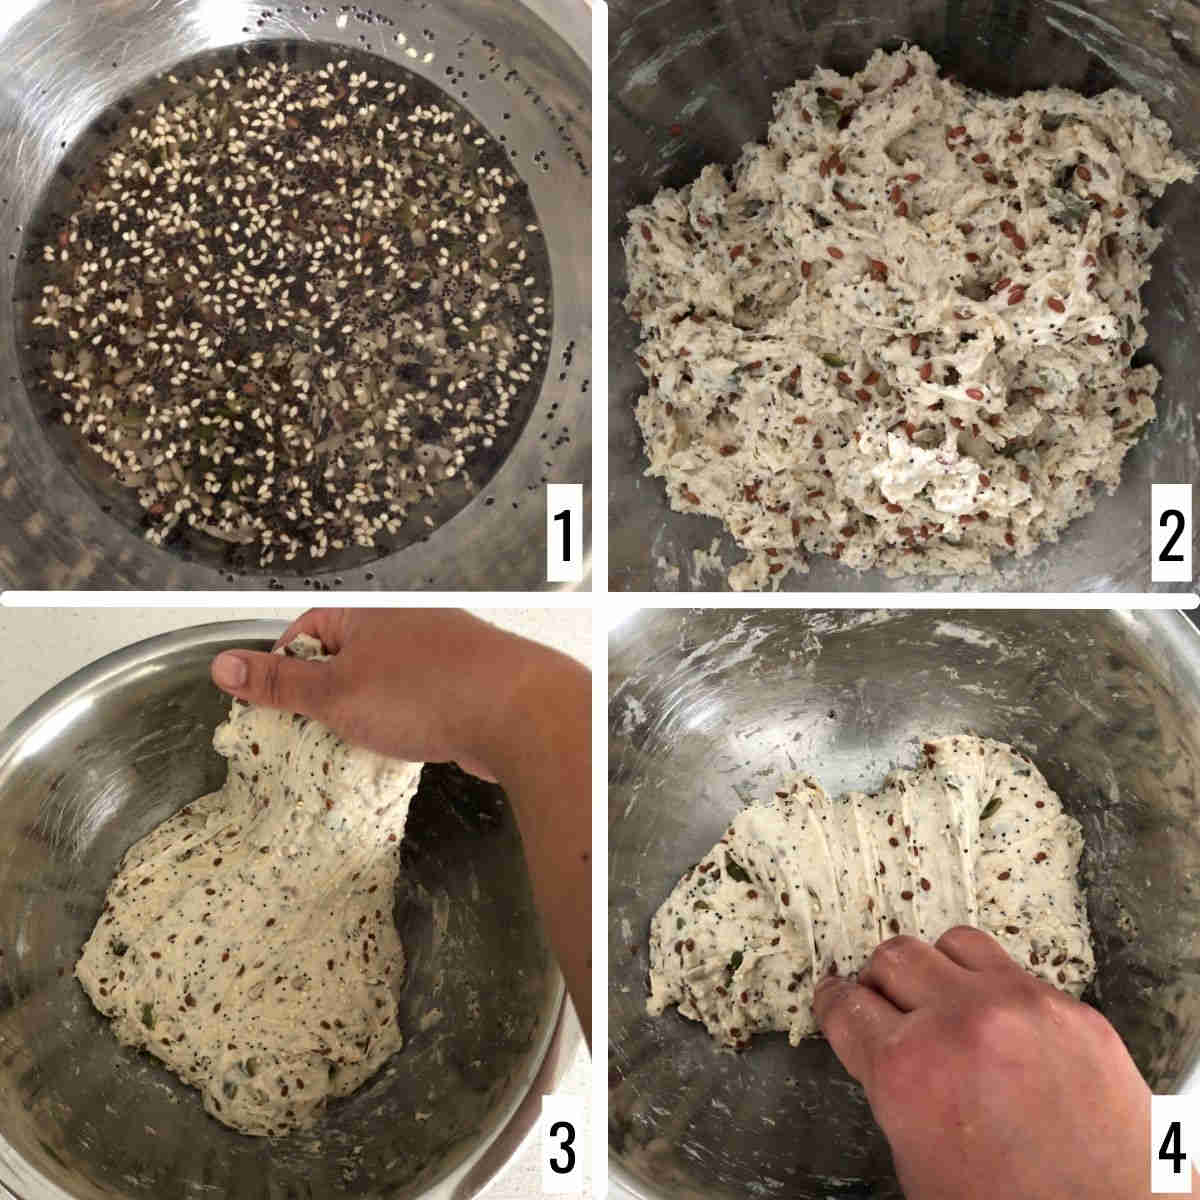
Step 1: Soak the seeds in water overnight in a large bowl (image 1). Next morning, add the active sourdough starter to the seed mixture and combine it well using a wooden spoon. Add salt and combine. Add flour and bring together to form a dough (image 2).
Step 2: Once the dough has rested for 30 minutes, gently pull the dough to perform stretch and fold (images 3 and 4).
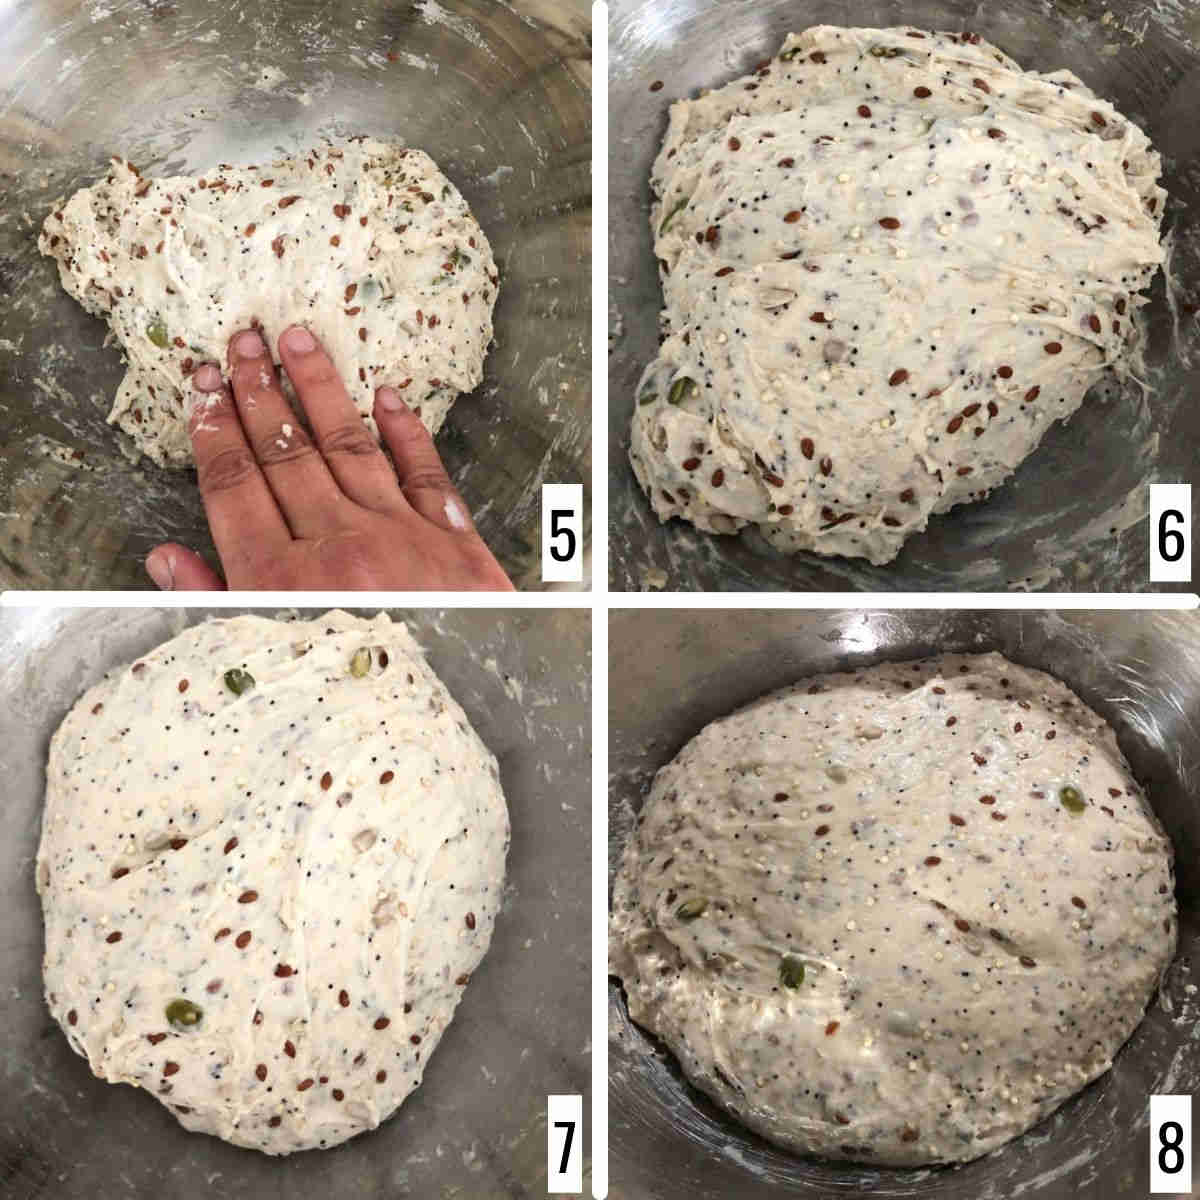
Step 3: Continue to stretch and fold the dough until it develops gluten and builds strength and structure. The number of stretch and fold cycles depends on the ambient temperature, so keep working until you begin to see the dough develop a structure (images 5 and 6).
Step 4: Let the dough sit for bulk fermentation (image 7). The dough almost doubles after bulk fermentation (image 8).
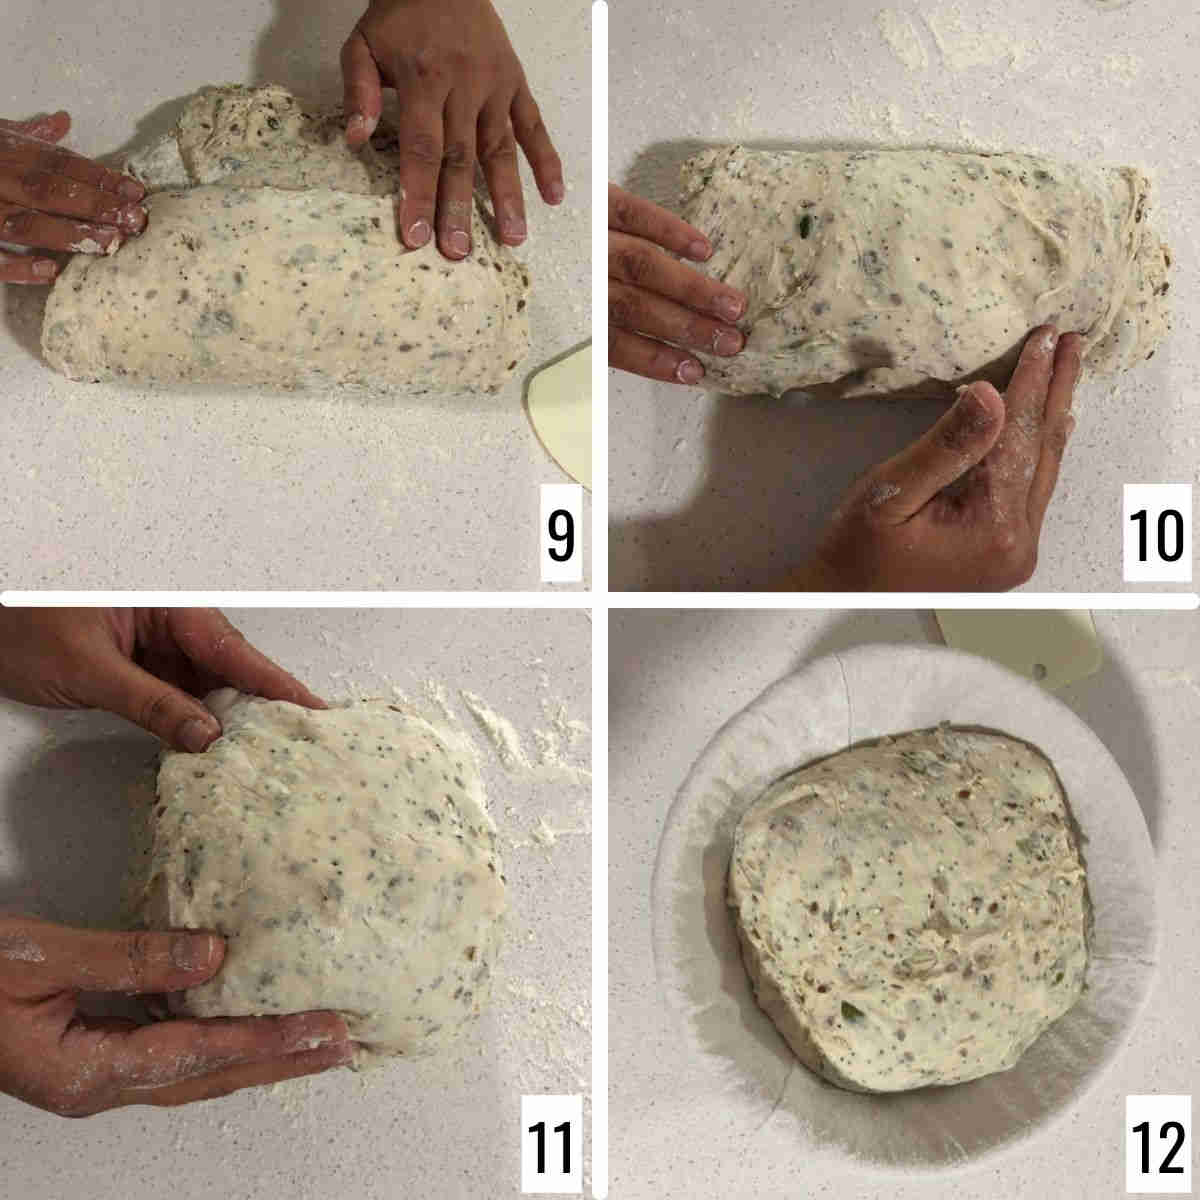
Step 5: To shape the dough, pick both sides of the dough and bring it to the center (images 9 and 10).
Step 6: Roll the dough to form a log. Place in a well-dusted kitchen banneton and cover loosely with a kitchen towel or plastic bag. Place in the refrigerator to begin the cold fermentation process (images 11 and 12).
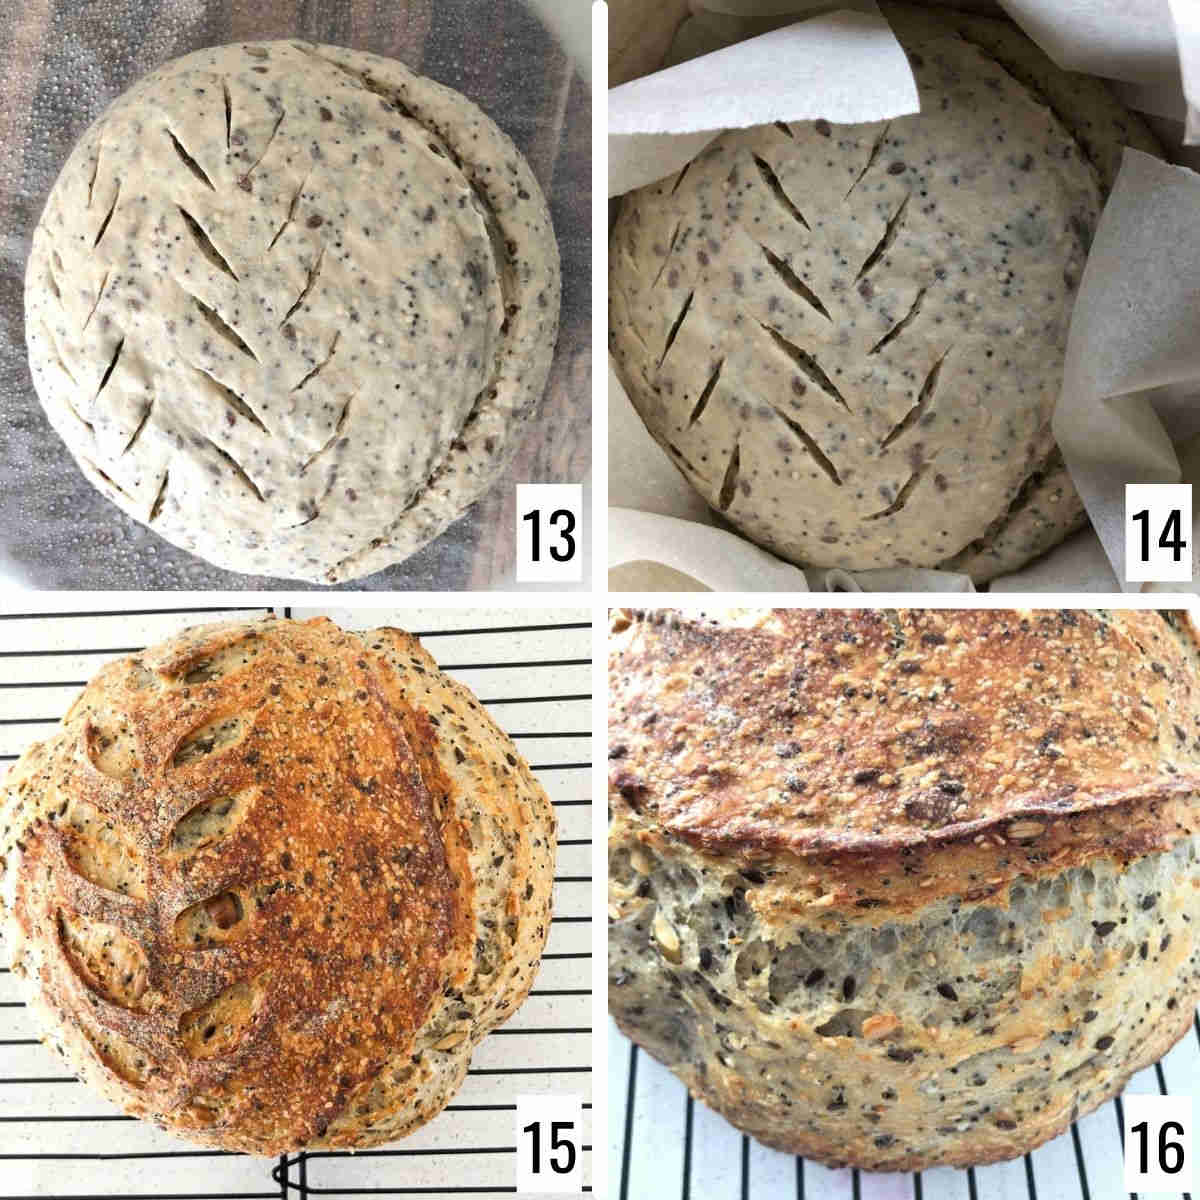
Step 7: Next morning, remove the dough from the fridge and score it (image 13).
Step 8: Place in the hot Dutch oven and bake with the lid on. Next, bake the seeded sourdough loaf without the lid (image 14).
Step 9: Cool completely on a wire rack before slicing (images 15 and 16).
Expert Tips
You can increase or reduce the quantity of seeds as per your preference. You can also add some extra seeds on top of the dough just before baking it.
Measure the amount of water you use to soak the seeds, and this water is used to make the dough as well. Soaking the seeds can help prevent them from drawing moisture from the dough during the baking process, ensuring a moist crumb.
Handle the dough carefully while stretching and folding, given that the seeds may make it slightly tricky to handle.
How to serve seeded sourdough bread?
Toasted with spreads: Slice the seeded sourdough bread and toast it until golden brown. Serve it with your favorite spreads such as butter, strawberry jam, honey, nut butter, cream cheese, or avocado mash.
Sandwich: Sourdough seed bread works very well with this yogurt sandwich recipe or a curried egg sandwich.
Soups and stews: Serve seeded sourdough bread alongside hearty soups and stews. It is perfect for dunking into tomato soup, lentil soup, chicken soup, or a comforting bowl of stew.
Recipe FAQs
Absolutely! The quantity of seeds can be adjusted according to your preference. If you prefer a more subtly seeded bread, reduce the amount of seeds. For a more pronounced seed presence, increase the quantity.
Yes! You can customize the seed combination to your liking. Feel free to experiment with various seeds and their proportions. Sunflower seeds, chia seeds, pumpkin seeds, etc., work very well for this recipe.
Freezing the dough is not recommended as it can affect the texture and rise of the bread. However, you can freeze the baked sourdough seed bread. Slice the bread, wrap it tightly, and store it in a freezer-safe bag. Thaw and refresh as needed.

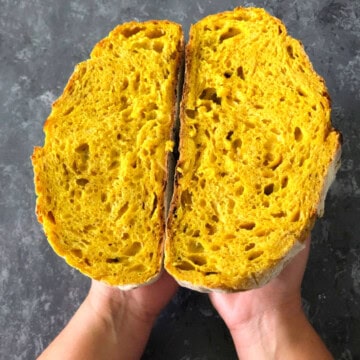
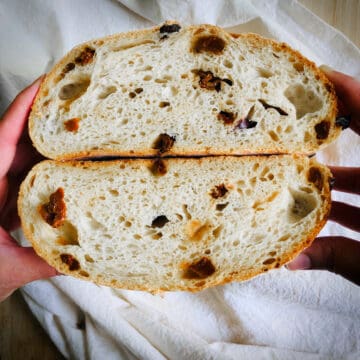
More sourdough recipes

If you tried this Seeded Sourdough Bread Recipe or any other recipe on my website, please leave a ? star rating and let me know how it went in the ? comments below.
Recipe card
Seeded Sourdough Bread
Equipment
- Bread lame or razor blade to score the dough
Ingredients
- 100 grams sourdough starter active
- 335 grams bread flour
- 40 grams whole wheat flour
- 335 grams filter water
- ½ teaspoon salt
- 120 grams seeds I used a mix of flax seeds, poppy seeds, sesame seeds, and pumpkin seeds
- Rice flour to dust the banneton
Instructions
Soak the seeds and make the initial dough:
- Soak the seeds in 335 grams of water overnight.
- Next morning, add the active starter to the seeds-water mixture. Combine the starter well with rest of the ingredients.
- Add salt and mix well.
- Slowly add both the flours. Mix well making sure there are no dry bits of flour. Let it rest for 30 minutes.
Bulk Fermentation:
- Perform six sets of stretch and fold at an interval of 30 minutes. With wet hands, grab a portion of the dough and slowly stretch it taking care not to break it, and fold it towards the center over the dough. Keep turning the bowl and repeat the process until all parts of the dough is covered. Carefully flip the dough and round it up. This completes one set of stretch and fold. Repeat this process six times at an interval of 30 minutes.
- Let the dough sit for bulk fermentation until it is almost double and has bubbles on the top. This may take 3-4 hours depending on the ambient temperature.
Shaping and cold fermentation:
- Dust a round or oval banneton well with rice flour.
- Flip the dough onto a lightly floured surface. Pick one side of the dough and fold it to the center. Pick the other side and fold it to the center. Now hold the dough gently and tuck it to form a log. Carefully place the dough seam-side up on the banneton.
- Cover the dough loosely and place it in the refrigerator overnight for cold fermentation.
Bake the seeded sourdough bread:
- Next day, place the Dutch oven in the oven and preheat to 450 F (230 C) for 45 minutes.
- Once the oven is preheated, take the dough out of the fridge. Flip it onto a parchment paper or baking sheet.
- Score the dough using a blade or sharp knife.
- Carefully take the Dutch oven out of the oven. Place the scored dough along with the baking paper into the hot Dutch oven and close the lid.
- Place it back in the oven and bake for 20 minutes.
- Take the lid off the Dutch oven and bake for another 15 minutes.
- Turn off the oven and keep the door ajar. Let the bread sit in the oven for 15 minutes for curing.
- Cool completely, slice, and serve.

Comments
No Comments