
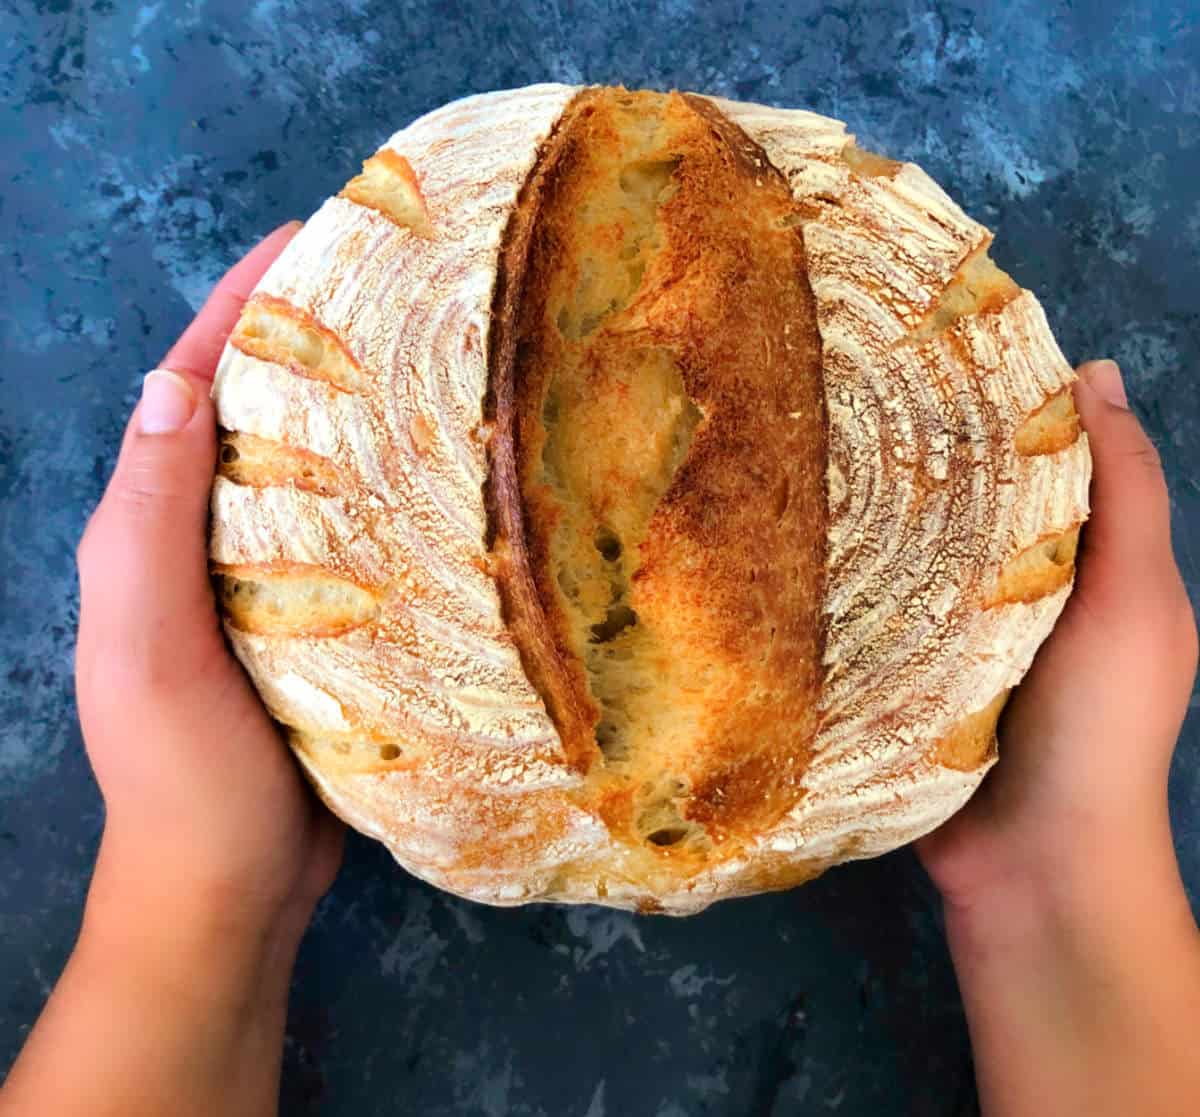
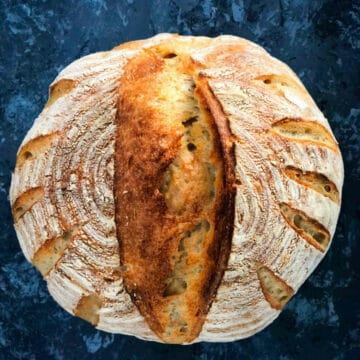
Baking sourdough bread might seem intimidating at first, but with some patience and practice, it is a skill that anyone can master. Sourdough bread is known for its distinct flavor, chewy texture, and crispy crust.
It is made with only four ingredients: flour, water, salt, and sourdough starter culture. In this recipe post, I will walk you through the process of making easy sourdough bread that is both delicious and has perfect crust and crumb.
Why you will love this recipe?
- This sourdough bread recipe is tried and tested to give you the perfect bread in every bake.
- I have provided detailed instructions for each step of the process, including how to mix and ferment the dough and how to shape and bake the bread.
- In this post, you will find tips and tricks for each stage of baking, including bulk fermentation, shaping, cold fermentation, and baking the loaf.
Ingredients
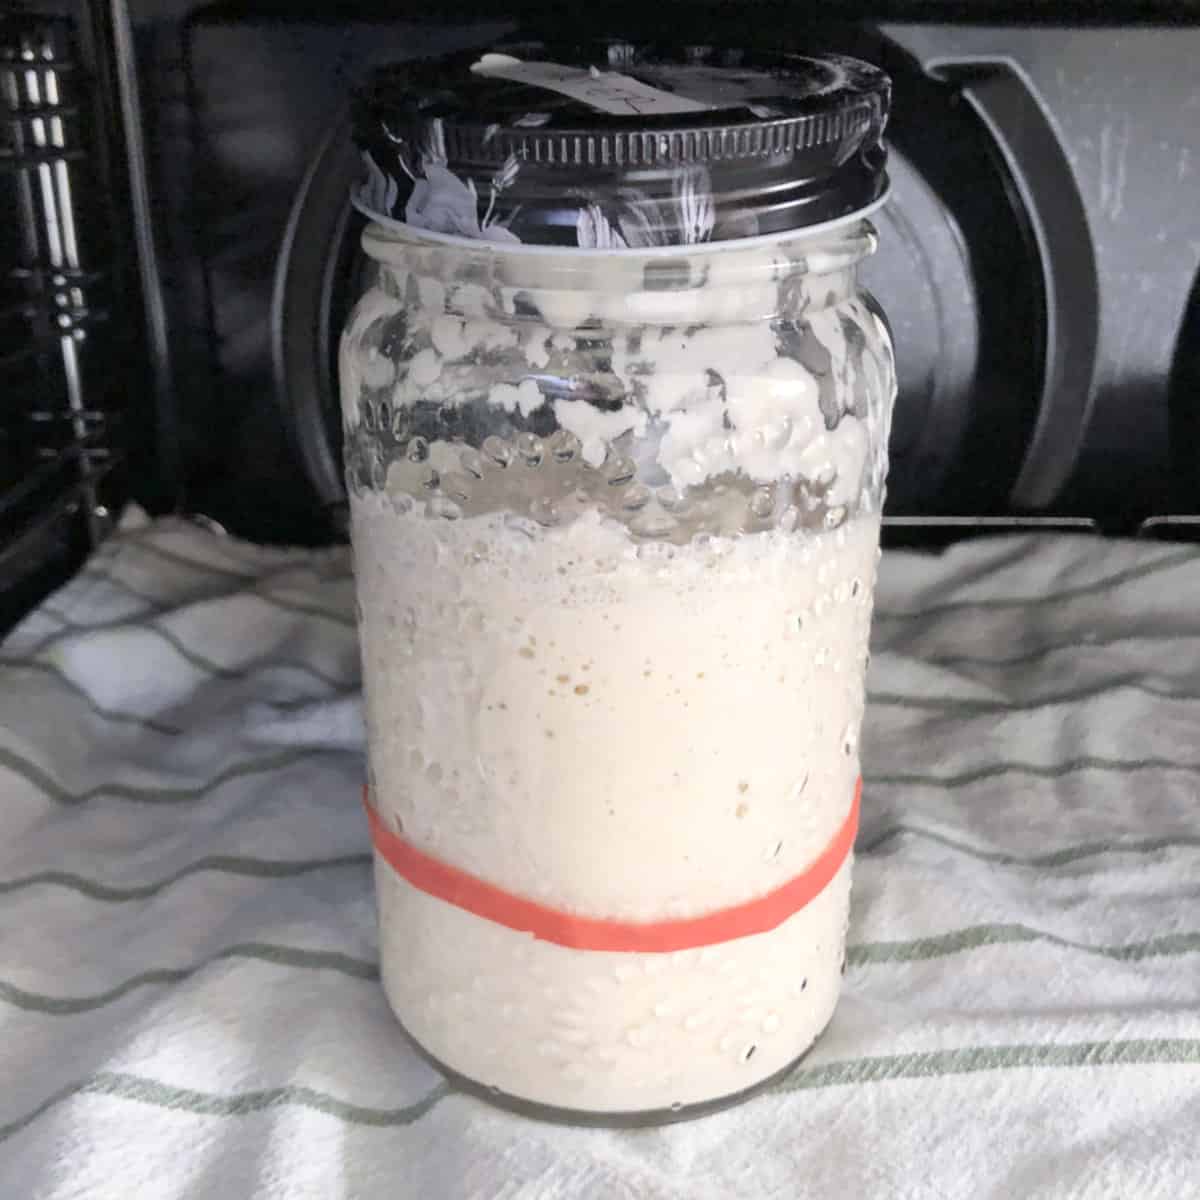
Sourdough starter: The first step in making sourdough bread is creating a sourdough starter. Make sure the sourdough starter is active and ready for baking.
Flour: I am using bread flour in this recipe. However, you can you a mix of different flours like all-purpose flour, whole wheat flour, or rye flour.
See the recipe card for full information on ingredients and quantities.
Step-by-step instructions to make sourdough bread
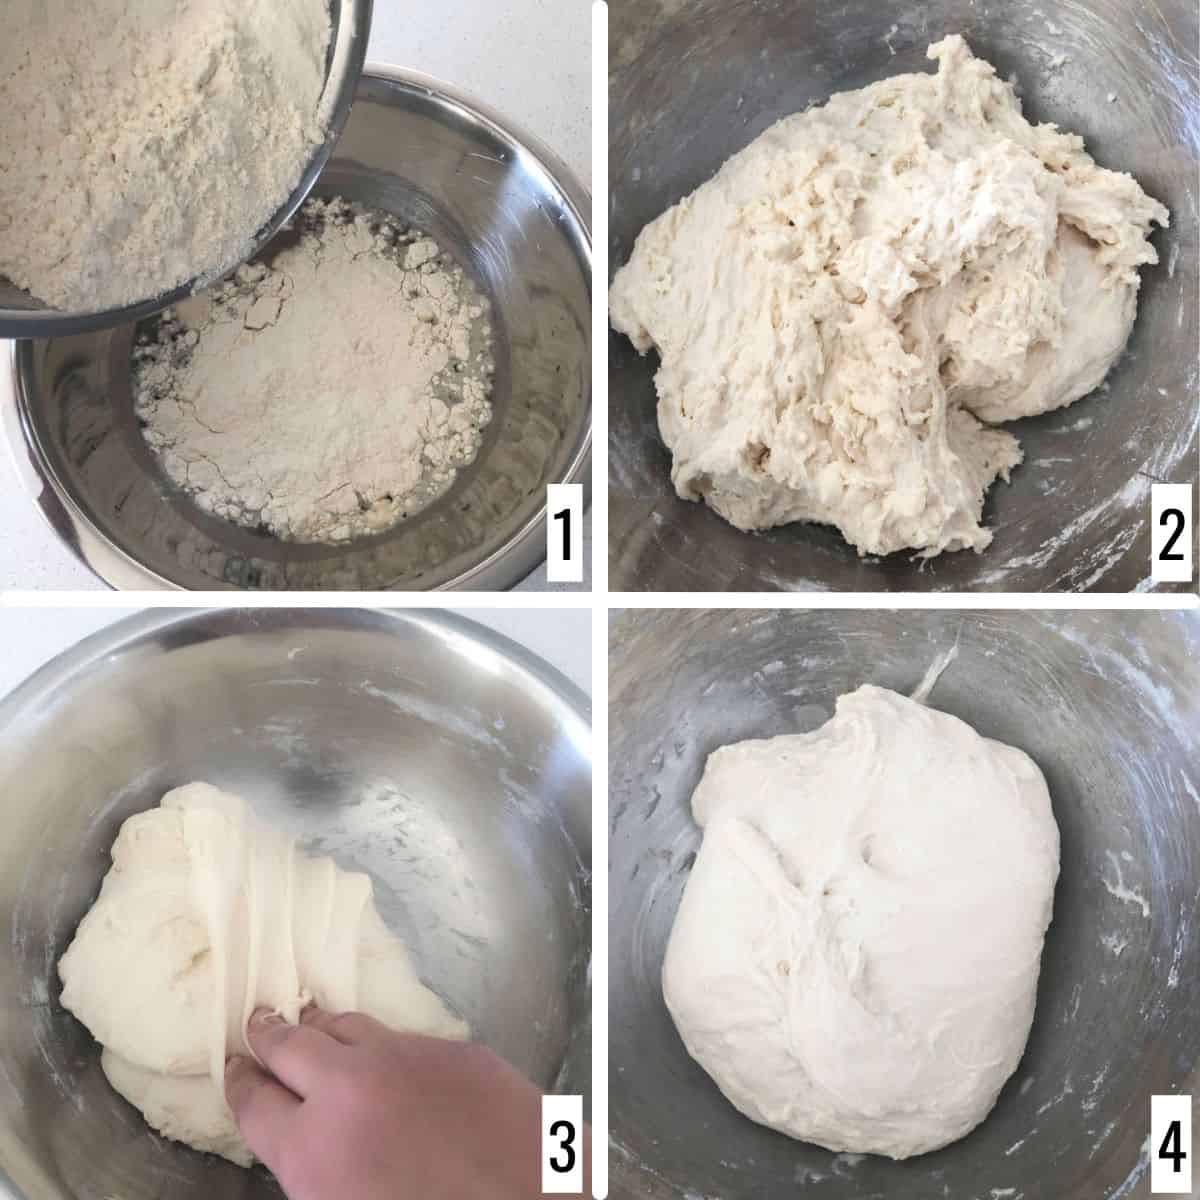
Step 1: Mix water and active sourdough starter together in a large mixing bowl. Slowly add flour and salt. Combine well using a dough whisk or wooden spoon, making sure there are no dry bits of flour. The dough will be quite wet at this stage. Cover the large bowl with a tea towel and let it sit at room temperature for 1 to 1.5 hours. This stage is called the autolyze (images 1 and 2).
Step 2: After autolysis, we need to perform stretch and fold. I aim to perform six sets of stretching and folding at an interval of 20 to 30 minutes (images 3 and 4).
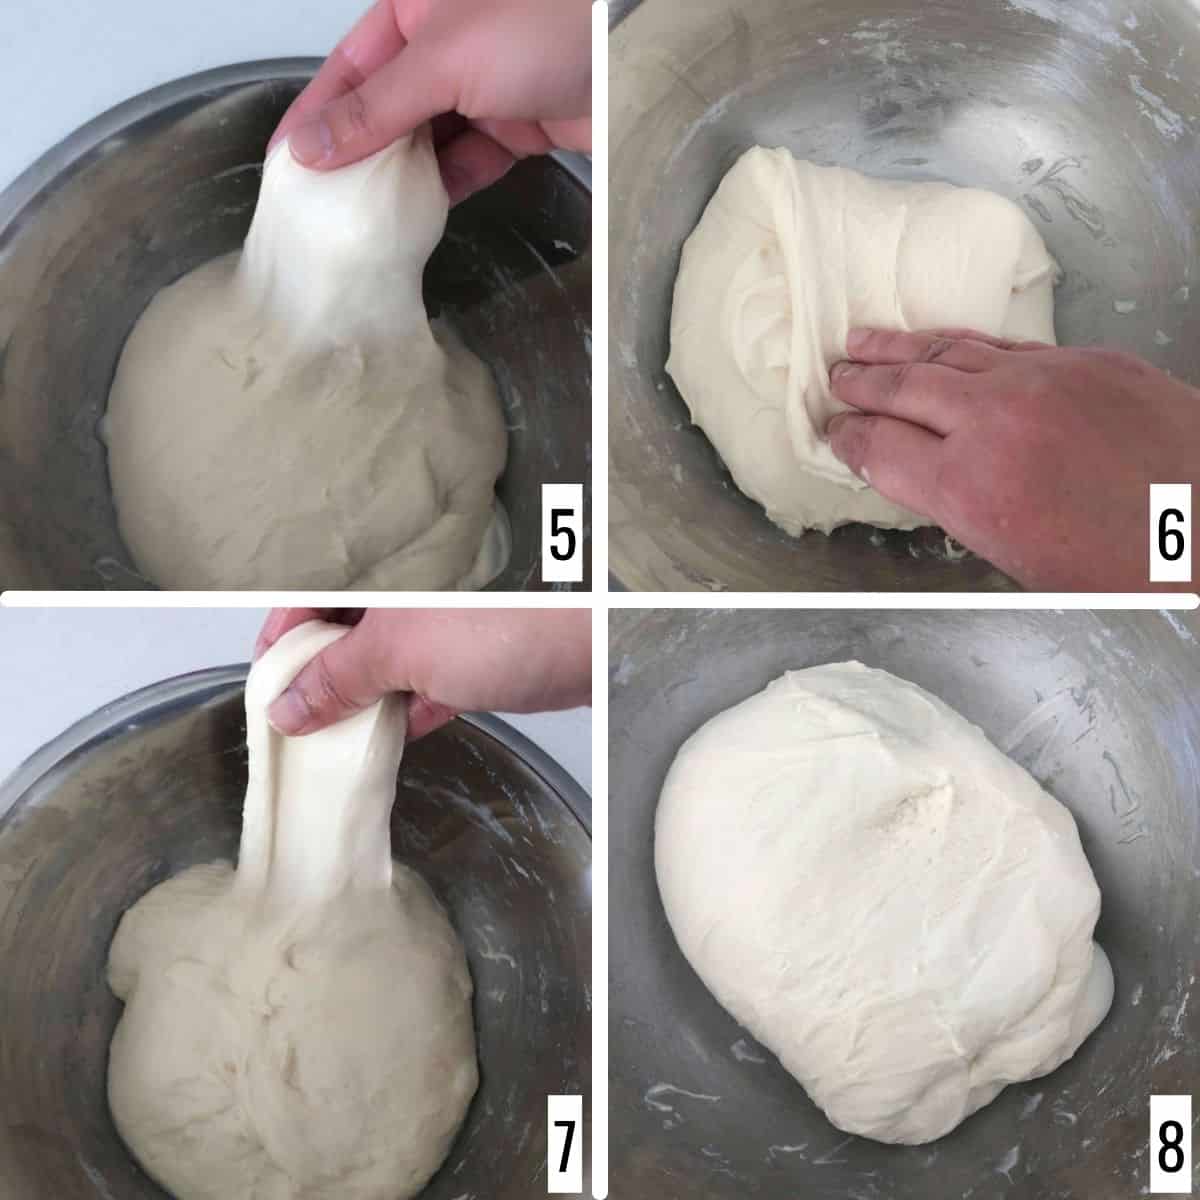
Step 3: To perform stretch and hold, wet your hands. Gently loosen the dough from all sides of the bowl. Grab a portion of the dough and slowly stretch it, taking care not to break it, and fold it towards the center over the dough (images 5 and 6).
Step 4: Keep turning the bowl and repeat the process until all parts of the dough are covered. Carefully flip the dough and round it up. Cover and let it rest until it is time for the next set of stretch and fold (images 7 and 8).

Step 5: You can see the sticky dough develop structure and strength as you continue the stretch and fold. The messy and shaggy dough will slowly turn into a well-developed dough (images 9 and 10).
Step 6: After the stretch and fold, let the dough sit for bulk fermentation. The time for bulk fermentation depends on the ambient temperature of the place where the dough sits. The bulk fermentation is done when the dough is almost double and has bubbles on top. Gently pull the dough from a corner and see if it has fairly large bubbles underneath (images 11 and 12).
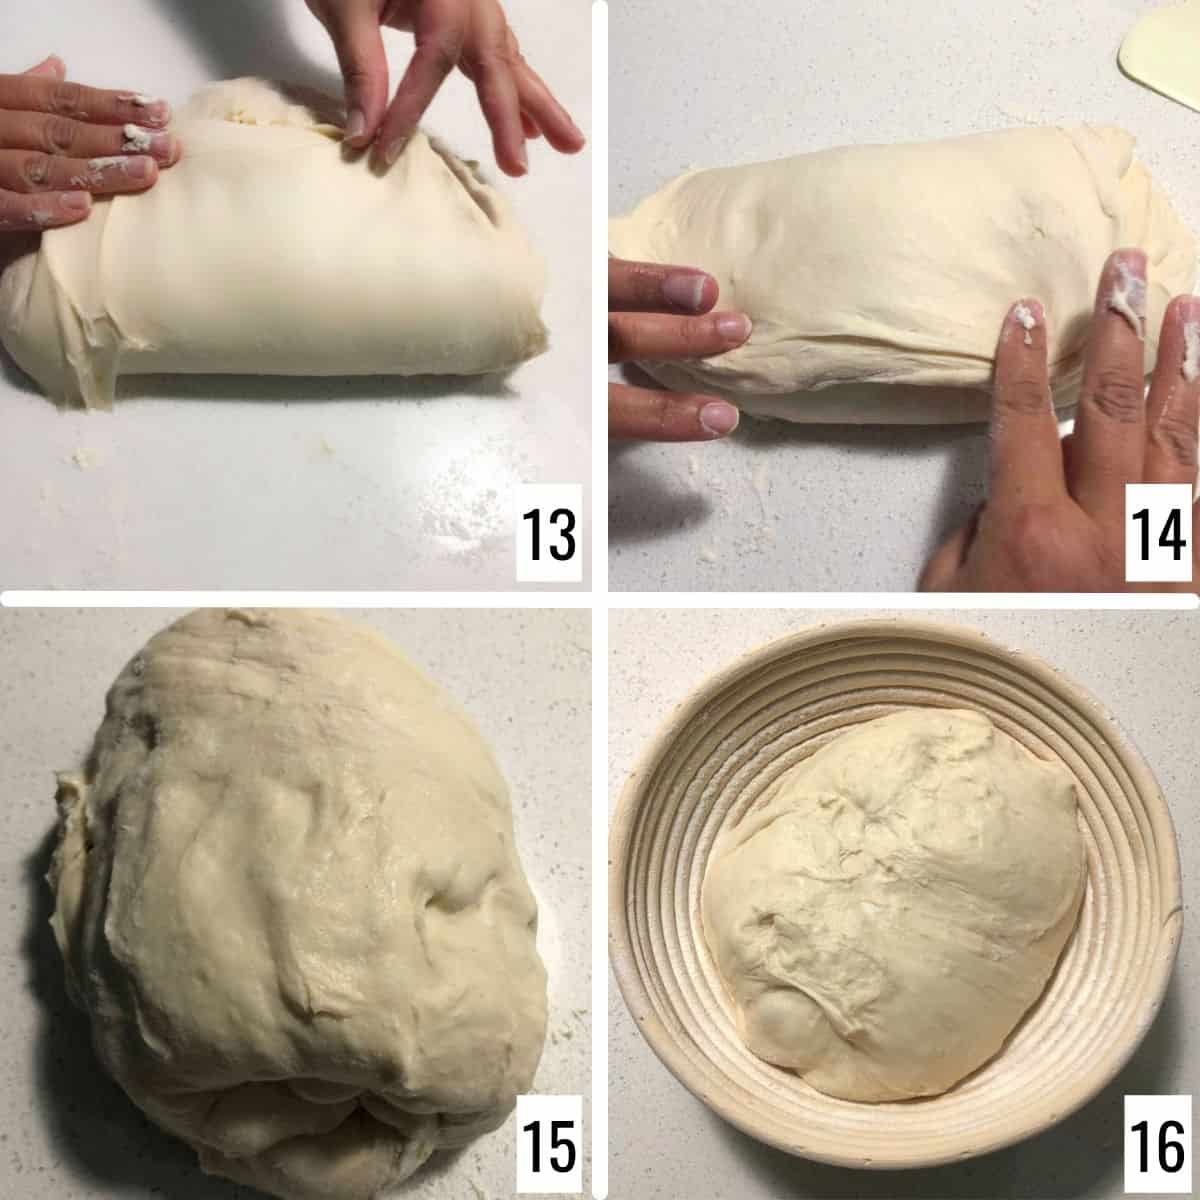
Step 7: The next step after bulk fermentation is shaping the dough. Dust the bench lightly with flour and turn the dough onto it. Pick one side of the dough using a dough scraper and fold it to the center. Pick the other side and fold it to the center (images 13 and 14).
Step 8: Now hold the dough gently and tuck it to form a tight ball. Carefully place the dough seam side up on the banneton basket or proofing basket. Gently lift the sides of the dough and dust some more rice flour. Cover the dough loosely with a clean shower cap or place a cling wrap or plastic bag loosely. Place in the refrigerator overnight or for up to 24 hours for the second rise (images 15 and 16).
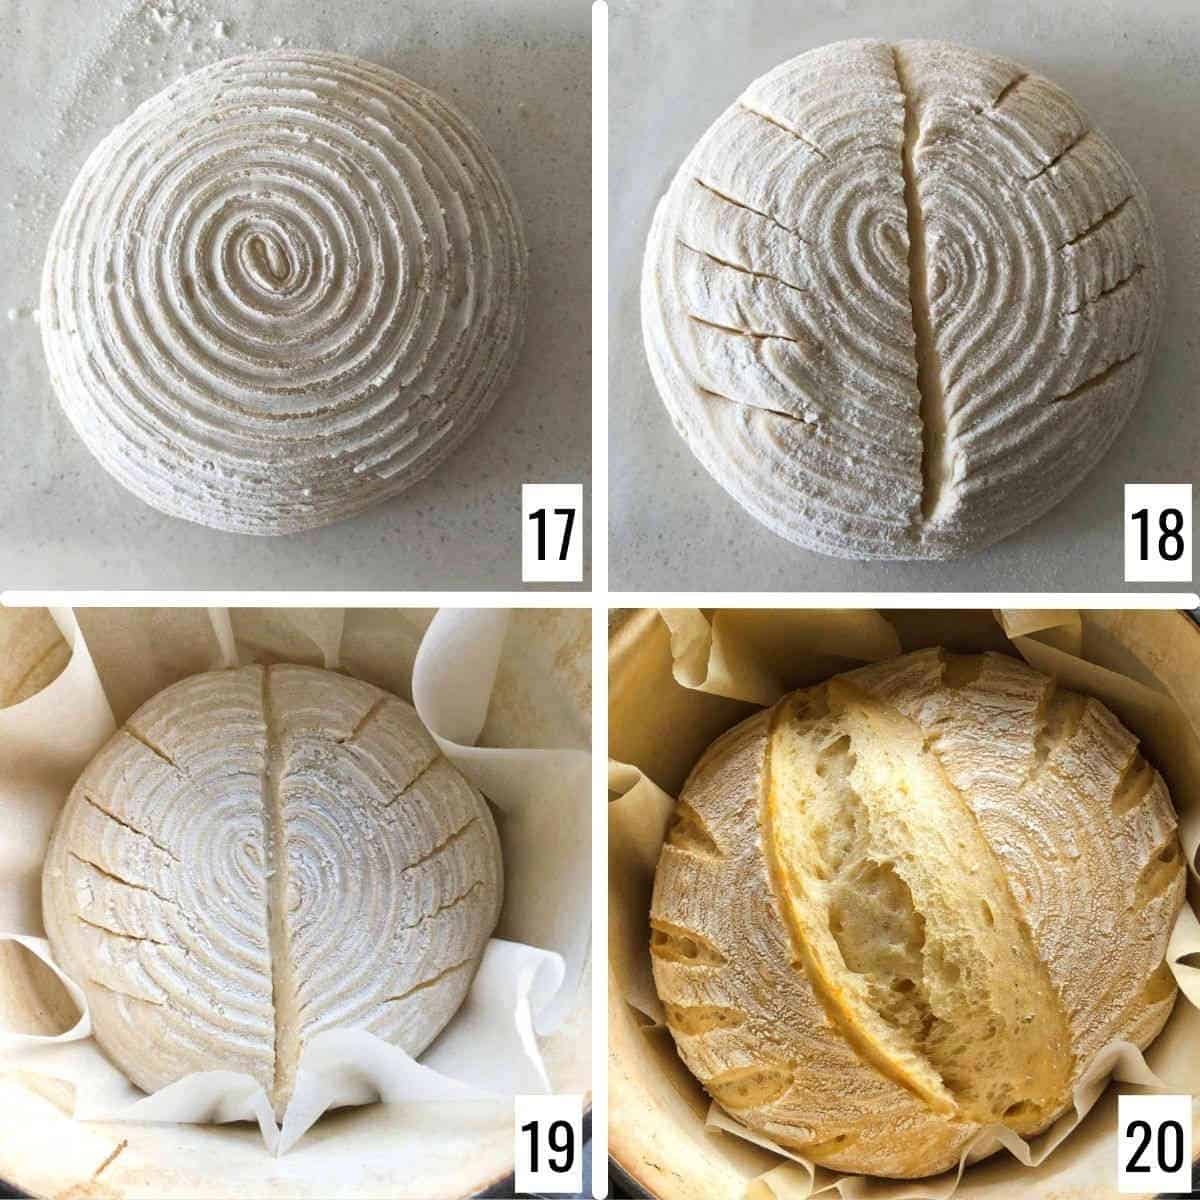
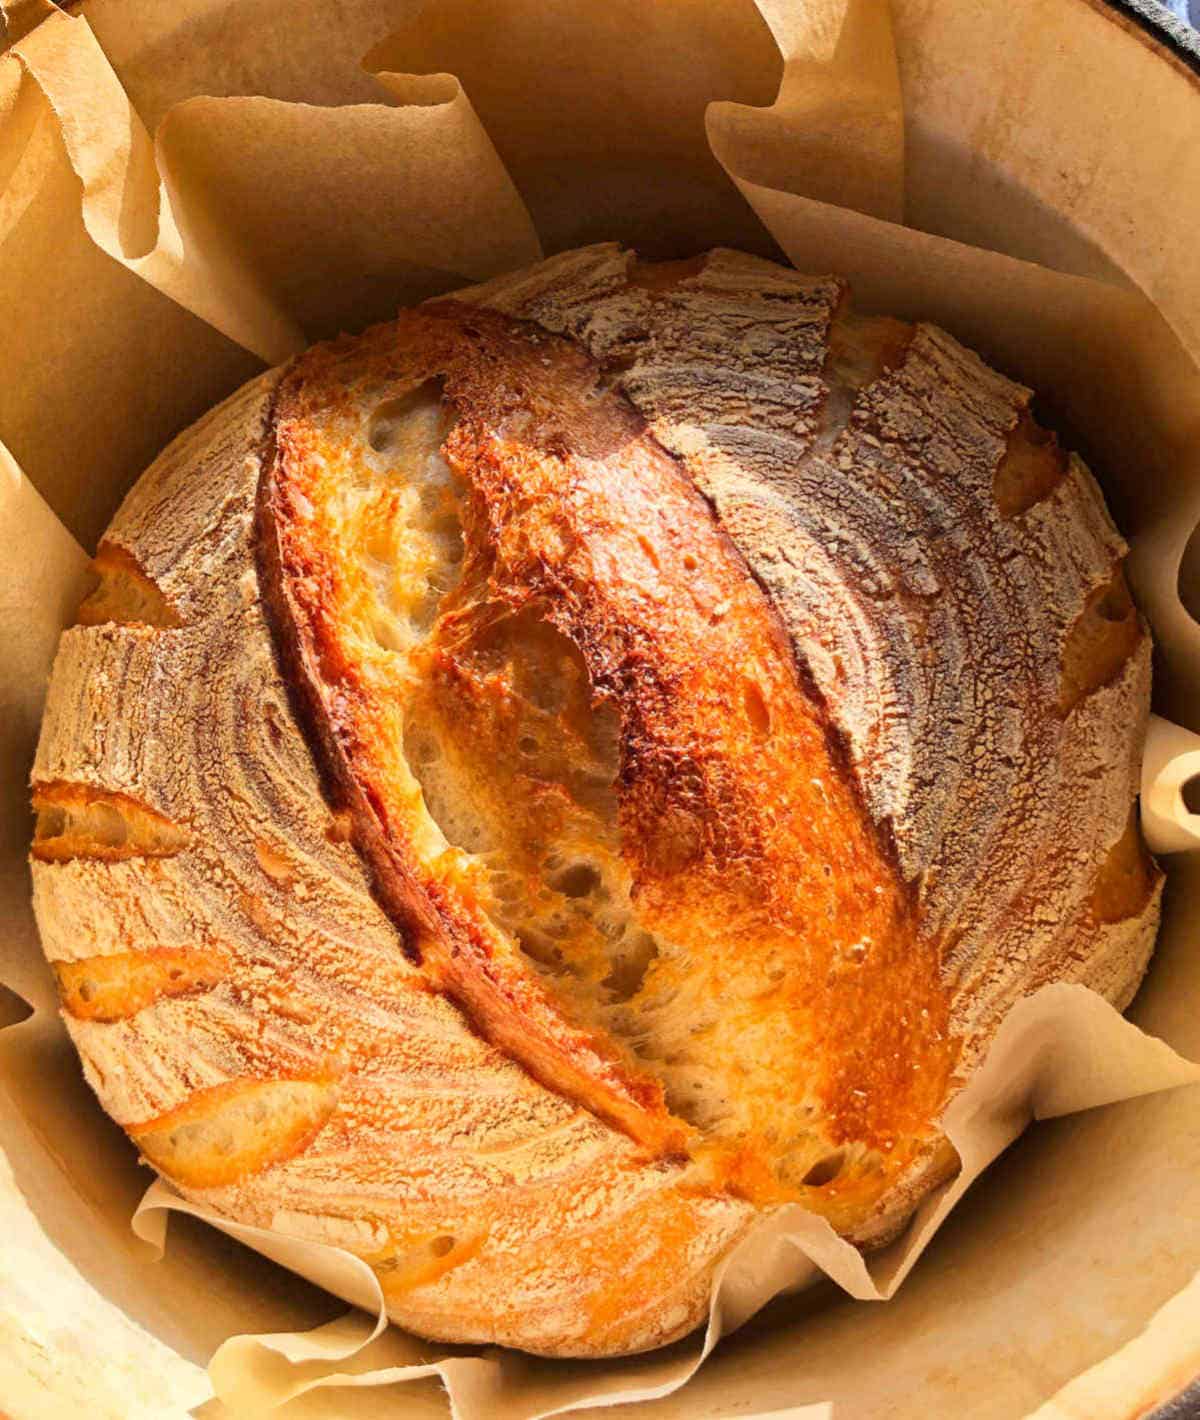
Step 9: The next day, place a cast iron Dutch oven with the lid on in the oven and preheat it to 450 F (230 C) for 30 minutes. Once the oven preheats, take the dough out of the refrigerator and carefully flip it onto a baking sheet lined with a piece of parchment paper. Score the dough with a razor blade or sharp knife. Make the cut approximately ¼ inch deep across the bread (images 17 and 18).
Step 10: Take the Dutch oven out of the oven and open the lid. It will be very hot at this stage so handle the Dutch oven carefully. Carefully place the dough along with the baking sheet in the Dutch oven and cover with the lid. Place the Dutch oven back into the oven and bake for 25 minutes (images 19 and 20).
Step 11: Take the lid off and bake for a further 15 minutes.
Sample baking schedule
This is my schedule:
- FRIDAY NIGHT: Take the starter from the fridge and feed it with flour and water. Leave it at a warm temperature overnight.
- SATURDAY MORNING: Mix dough, stretch, and fold, bulk fermentation.
- SATURDAY NIGHT: Cold fermentation in the fridge.
- SUNDAY/MONDAY MORNING: Bake day.
Expert Tips
Practice good dough-handling techniques. Be gentle with your dough during the folding and shaping process to avoid deflating it. Use a bench scraper to handle the dough rather than your hands to keep it from sticking.
In the initial rise or bulk fermentation, aim for the dough to nearly double in size. Avoid overnight fermentation to prevent over-fermentation. Opt for a 4-6 hour period, adjusting based on the dough's feel rather than a strict timeframe. At the end of bulk fermentation, the dough should be smooth, slightly bubbly, and doubled in size.
Cold fermentation gives you flexibility in scheduling your baking time. Longer cold fermentation improves the taste, flavor, and texture of the bread to a great extent. I have left my dough in the refrigerator for as long as four days to cold ferment.
Use a sharp blade like a bread lame for scoring the dough. Hold it at a 45-degree angle, making swift cuts.
It is important to preheat the Dutch oven before adding the bread dough to it. This ensures that the bread starts baking right away and helps create a crispy crust. Preheat the Dutch oven for at least 30 minutes before adding the dough.
Keep the lid on the Dutch oven for at least the first 20 minutes of baking to trap steam inside and help the bread rise. Removing the lid too early can cause the bread to deflate.
Once the sourdough bread is baked (with and without the lid), turn off the oven and let the bread sit in the turned-off oven with the oven door open for 10-15 minutes. This will help cure the bread and develop the crumbs.
Allow the bread to cool completely before slicing. Sourdough bread needs time to cool and finish setting after baking. Slicing it too soon can result in a gummy texture and uneven slices. Let it cool for at least an hour before slicing.
Recipe FAQs
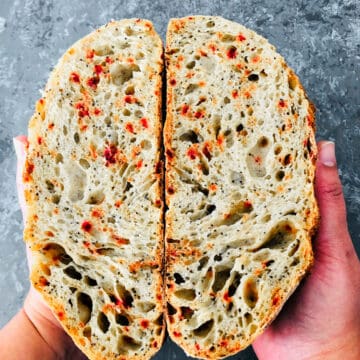
Sourdough bread is different from regular bread in several ways. It is leavened using wild yeast and regular bread is leavened with commercial instant yeast. Sourdough has a tangy, complex flavor, whereas regular bread has a milder flavor and aroma. Sourdough bread has a denser, chewier texture than regular bread, with a more open crumb structure and a crispier crust.
The best flour to use for sourdough baking depends on personal preference. However, it is important to use unbleached flour, and where possible, organic, and stone-ground flour. Some of the most common flour used are bread flour, rye flour, whole wheat flour, and spelt flour.
Sourdough bread is traditionally made with wheat flour, which contains gluten. However, it is possible to make gluten-free sourdough bread using alternative gluten-free flour and a gluten-free sourdough starter. Adding a binder such as xanthan gum or psyllium husk can help hold the dough together. Also, remember that gluten-free dough may take longer to rise than wheat-based dough so give the dough more time to rest.
If you tried this Sourdough Bread Recipe or any other recipe on my website, please leave a ? star rating and let me know how it went in the ? comments below.
Recipe card
Easy Sourdough Bread
Ingredients
- 100 grams sourdough starter
- 500 grams bread flour
- 375 grams water filtered
- 10 grams salt
- Rice flour for dusting banneton
Instructions
Make the dough:
- Make sure the starter is fully active before starting.
- Mix water and sourdough starter together.
- Slowly add flour and salt. Combine well making sure there are no dry bits of flour. The dough will be quite wet at this stage.
- Cover with a tea towel and let it sit at room temperature for 1 to 1.5 hours. This stage is called the autolyze.
Stretch and Fold:
- After autolysis, we need to perform stretch and fold. I aim to perform six sets of stretching and folding at an interval of 20 to 30 minutes.
- To perform stretch and hold, wet your hands. Gently loosen the dough from all sides of the bowl. Grab a portion of the dough and slowly stretch it taking care not to break it and fold it towards the center over the dough. Keep turning the bowl and repeat the process until all parts of the dough are covered. Carefully flip the dough and round it up. Cover and let it rest until it is time for the next set of stretch and fold. Pinch out any air bubbles that are formed during this process. You can see the dough develop structure and strength as you continue the stretch and fold. The messy and shaggy dough will slowly turn into a well-developed dough. See the pictures below or the video here to see the technique.
- You can either do the stretch and fold in the bowl itself or put the dough onto the bench to perform the stretch and fold. If you are putting the dough onto the bench, make sure you mist it with water first. It is important to always wet your hands before handling the dough and handle the dough gently.
Bulk Fermentation:
- After the stretch and fold, let the dough sit for bulk fermentation. As mentioned earlier, the time for bulk fermentation depends on the ambient temperature of the place where the dough sits. The bulk fermentation is done when the dough is almost double and has bubbles on top. Gently pull the dough from a corner and see if it has fairly large bubbles underneath.
Shape the dough:
- The next step after bulk fermentation is shaping the dough. To shape the dough, firstly dust the banneton or tea towel well with rice flour.
- Dust the bench lightly with flour and turn the dough onto it. The dough should gently pull itself down to the bench.
- Pick one side of the dough and fold it to the center. Pick the other side and fold it to the center.
- Now hold the dough gently and tuck it to form a log.
- Carefully place the dough seam-side up on the banneton. Gently lift the sides of the dough and dust some more rice flour.
- Take care to be very gentle with the dough and handle the dough as less as possible.
Cold fermentation:
- Cover the dough loosely with a clean shower cap or place a cling wrap loosely.
- Place in the refrigerator overnight or up to 24 hours.
Bake the sourdough bread:
- Place a Dutch oven with the lid on in the oven and preheat it to 450 F (230 C) for 30 minutes.
- Once the oven preheats, take the dough out of the refrigerator and carefully flip it onto a baking sheet.
- Score the dough with a razor blade or sharp knife. Make the cut approximately ¼ inch deep across the bread. You can score the dough to create designs/patterns you like.
- Take the Dutch oven out of the oven and open the lid.
- Carefully place the dough along with the baking sheet in the Dutch oven and cover with the lid.
- Place the Dutch oven back into the oven and bake for 25 minutes.
- Take the lid off and bake for a further 15 minutes.
- Turn off the oven and open the oven door. Let the bread sit in the turned-off oven for 15 minutes for curing.
- Take the bread out once cured and place on a wire rack to cool down completely.
- Slice and serve.

Cheryl says
I used your recipe for the atta flour sourdough starter, and this recipe for the sourdough bread. It turned out amazing! Your instructions were so clear, and your method led to a more "sour" loaf than the last recipe I followed. Yours is the winner for me! Thank you for sharing.
Shilpa Kerur says
Hi Cheryl, That's awesome to hear and I am so gload you loved my recipe. Thank you for your kind words 🙂 Happy baking!
- Shilpa