
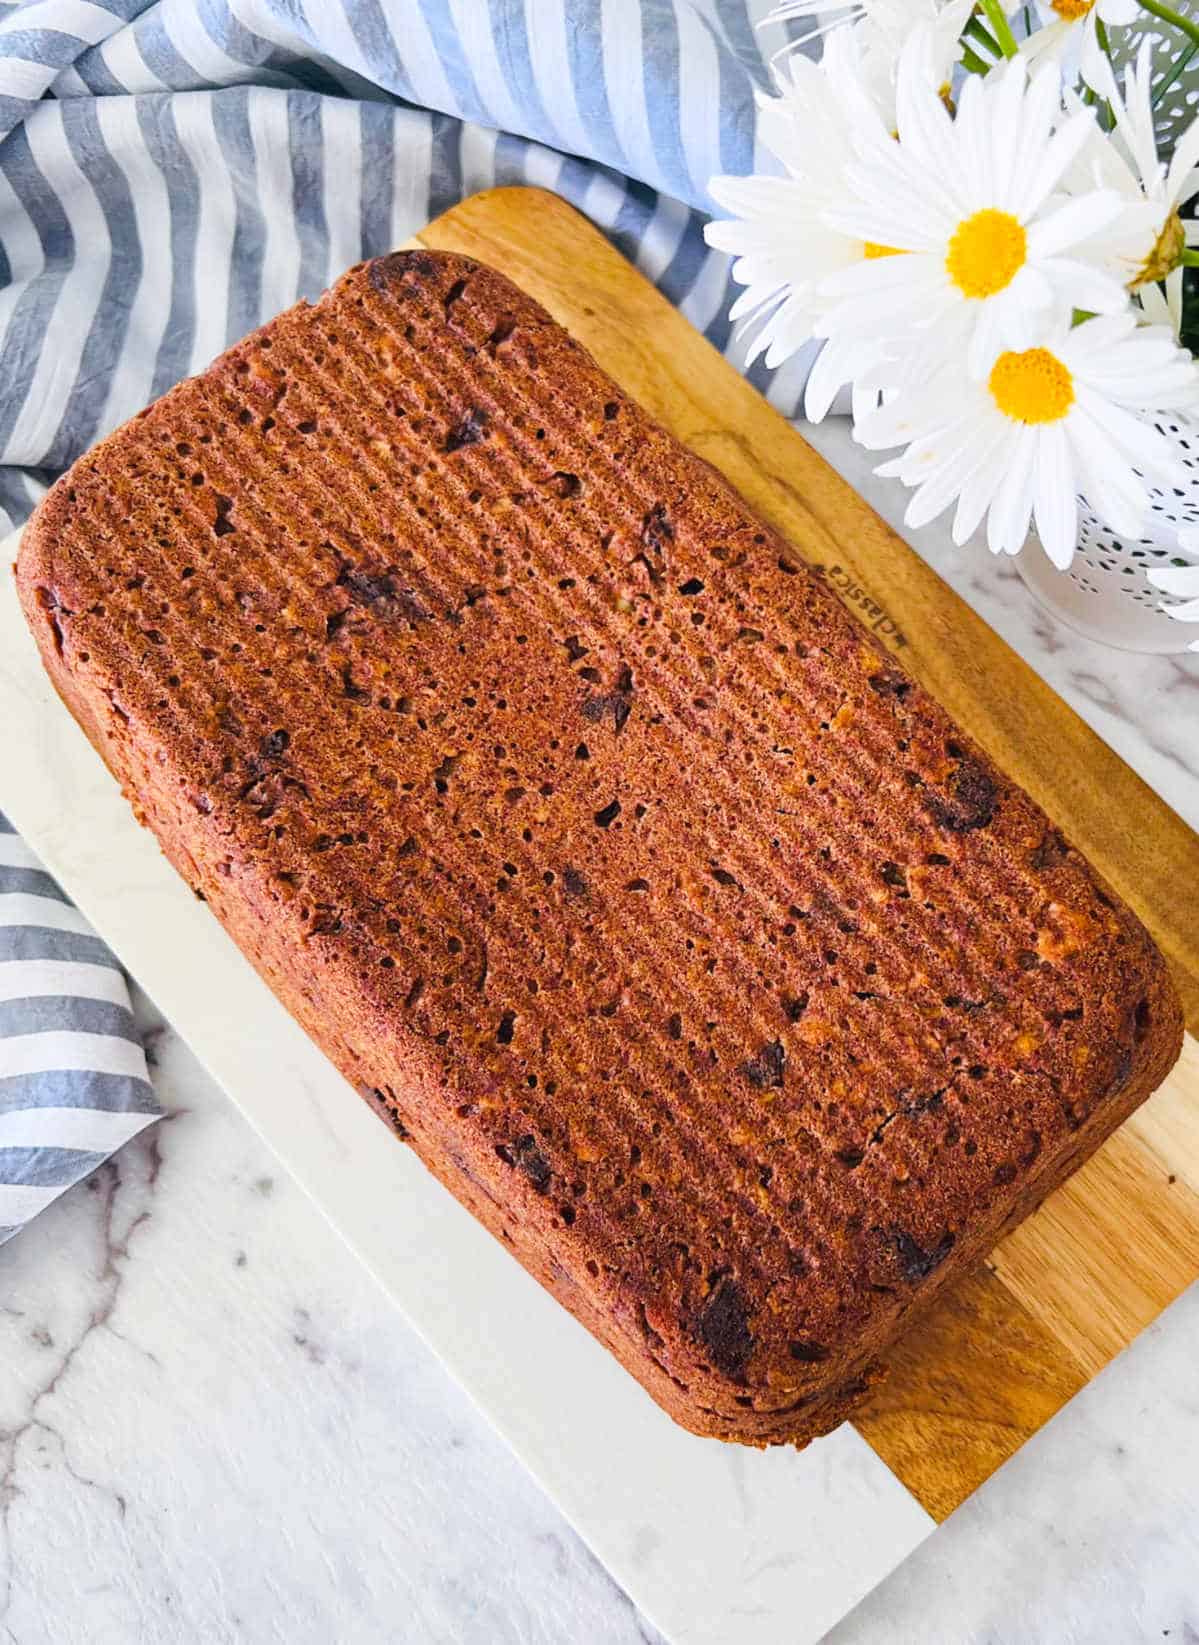
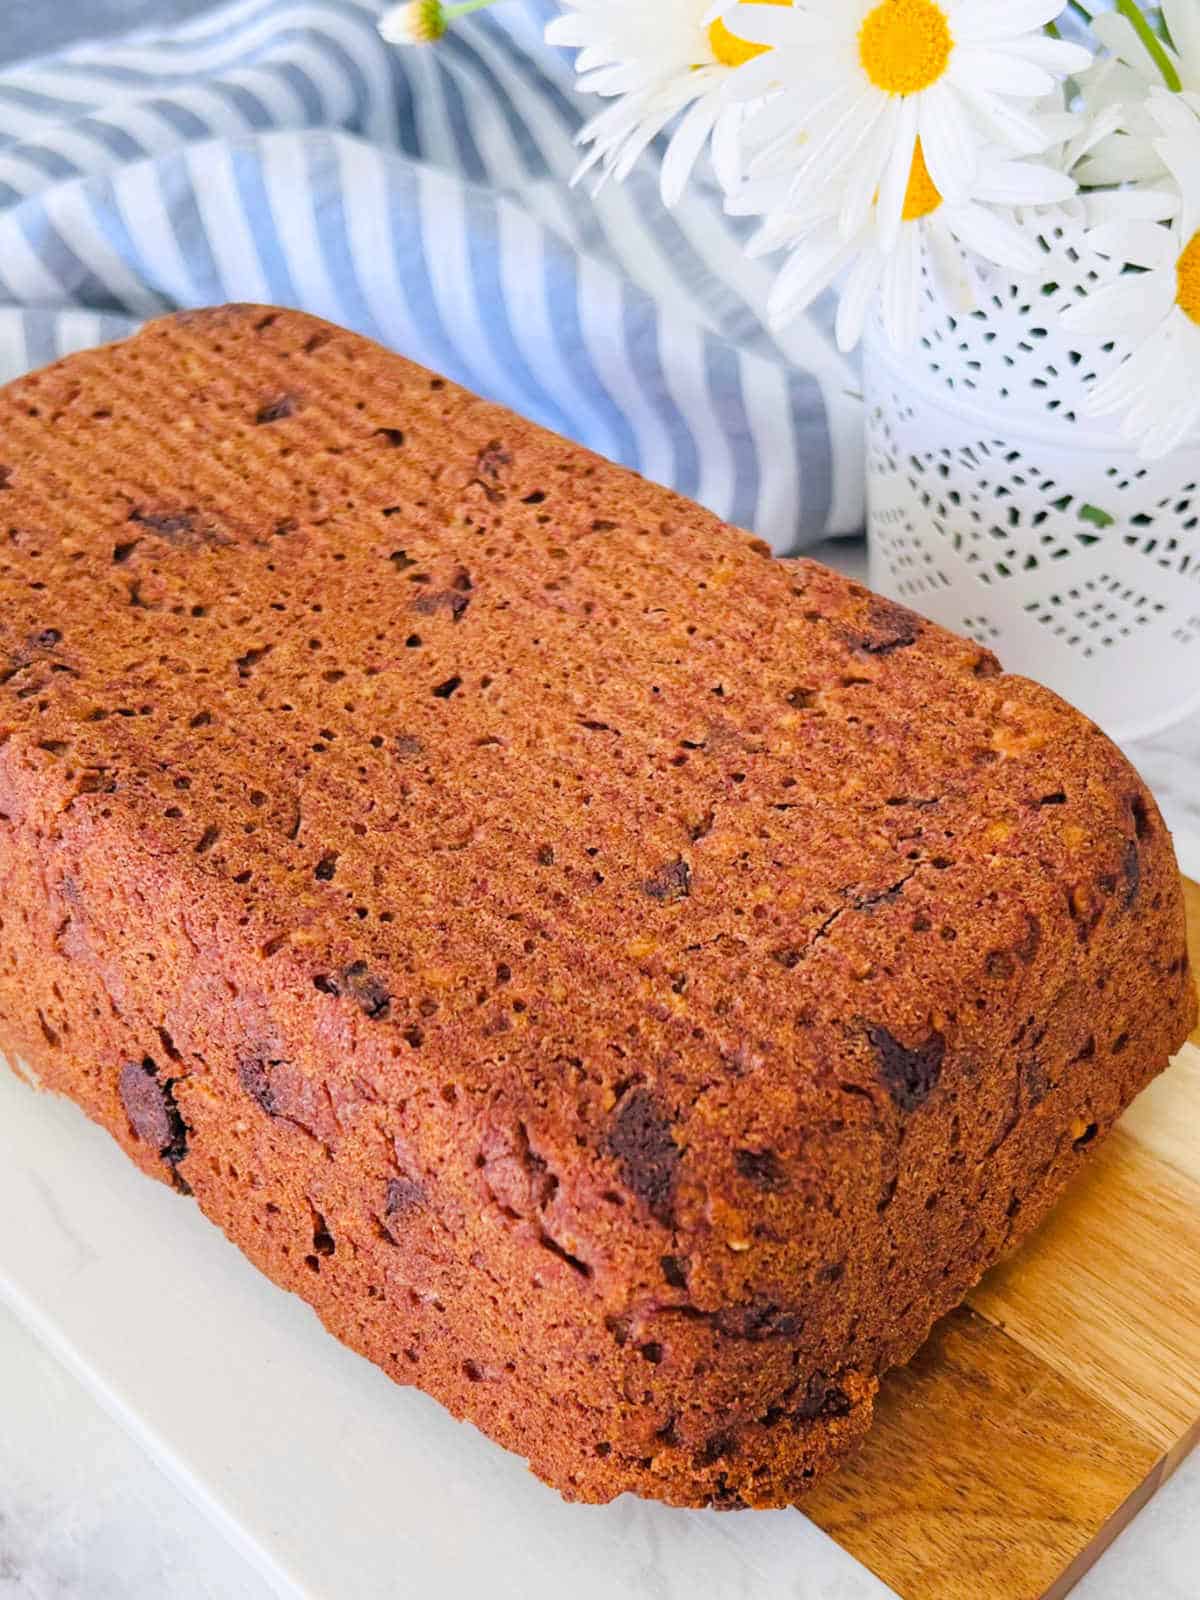
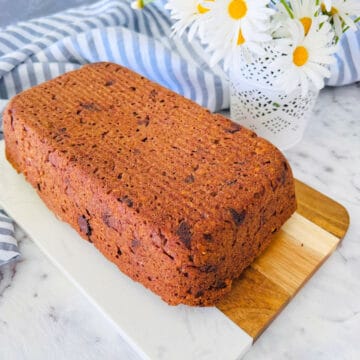
Indulge in the wholesome goodness of this delectable ragi cake. Made with finger millet flour and ripe bananas, this eggless and gluten-free delight is a treat for both taste buds. Want more? Here is my collection of delicious Indian ragi recipes.
Why you will love this recipe?
- Loved by the kids: The natural sweetness of ripe bananas and the moist texture of the cake make it a delightful treat that kids will love.
- Easy and convenient: With minimal prep time and straightforward instructions, it is very easy to put together.
Ingredients
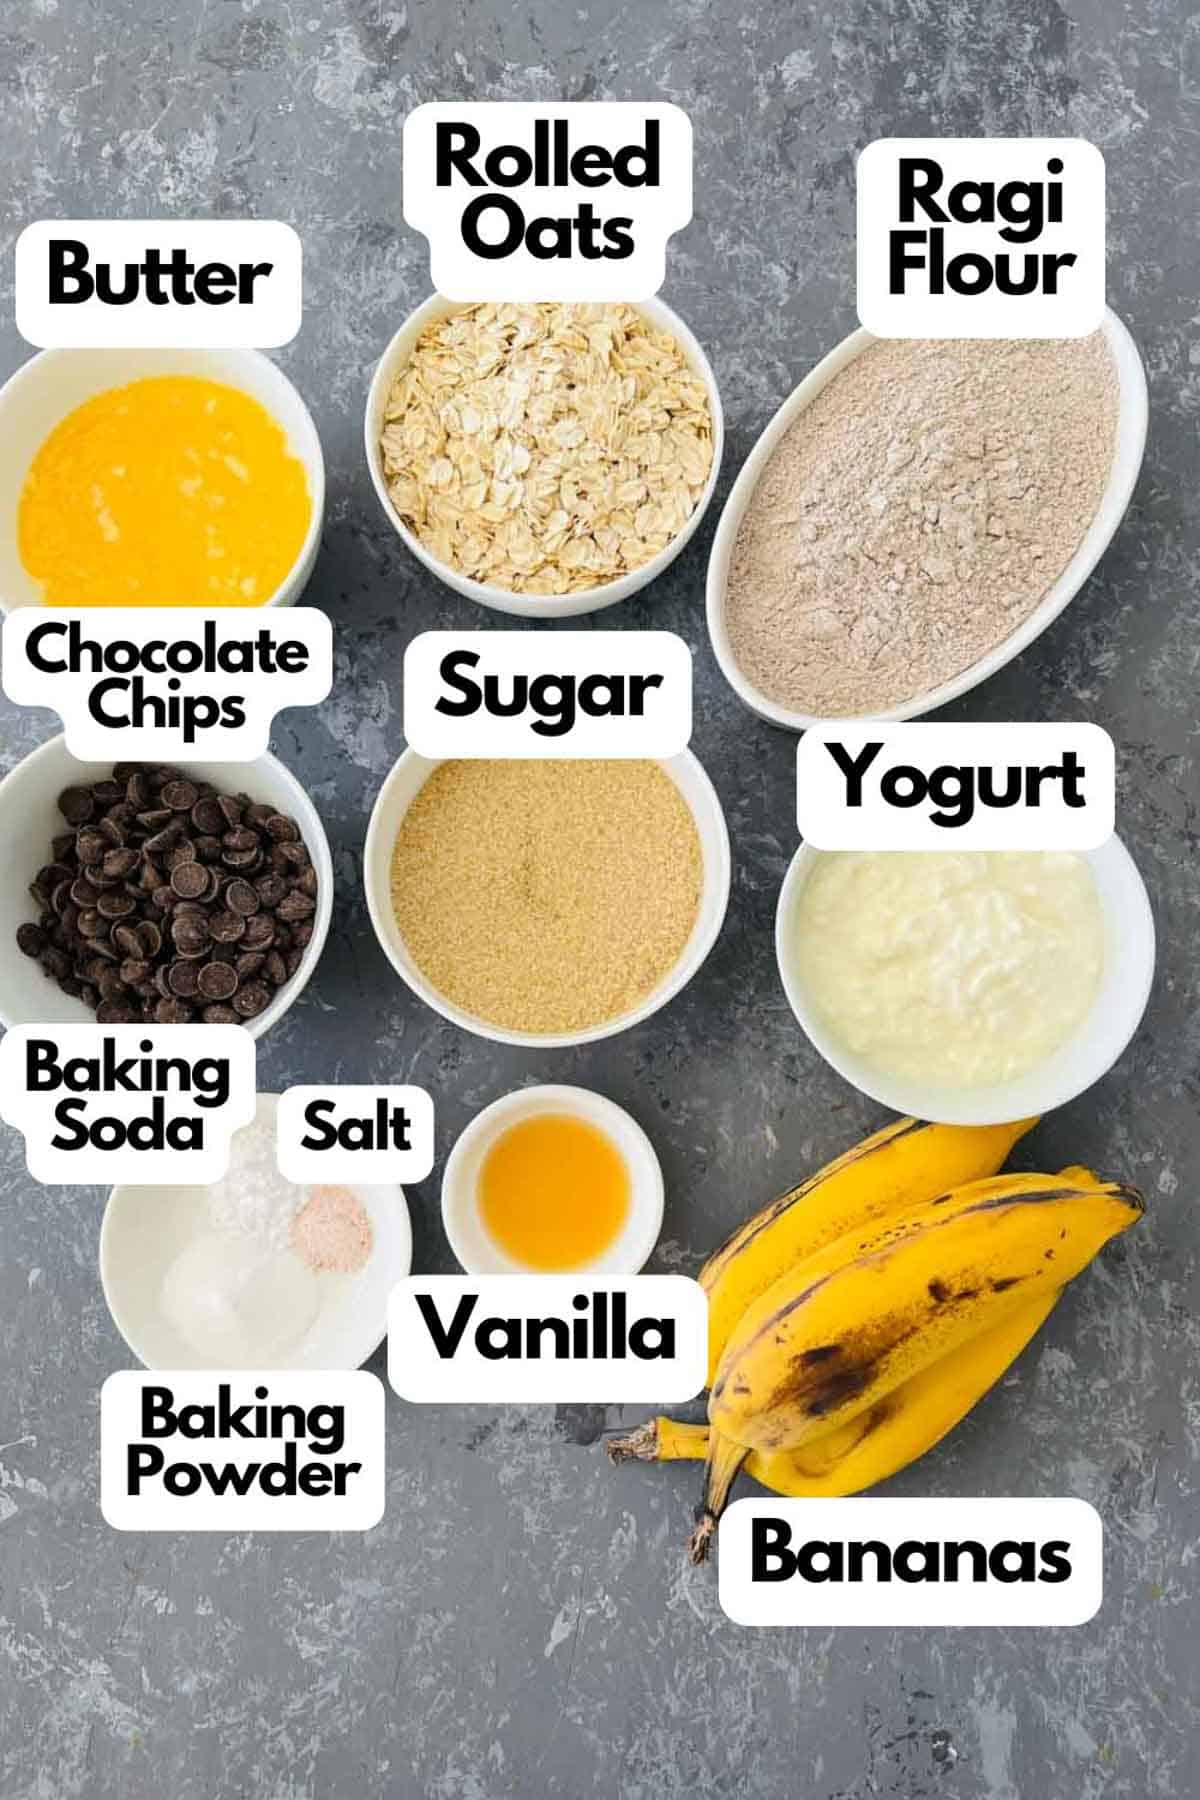
Ragi: Finger millet flour is the main ingredient of this recipe.
Banana: Use ripe bananas to make ragi banana cake.
Rolled Oats: Use thick rolled oats and not instant oats. Quick oats tend to absorb more liquid, making the ragi cake dry.
See the recipe card for full information on ingredients and quantities.
Step-by-step instructions
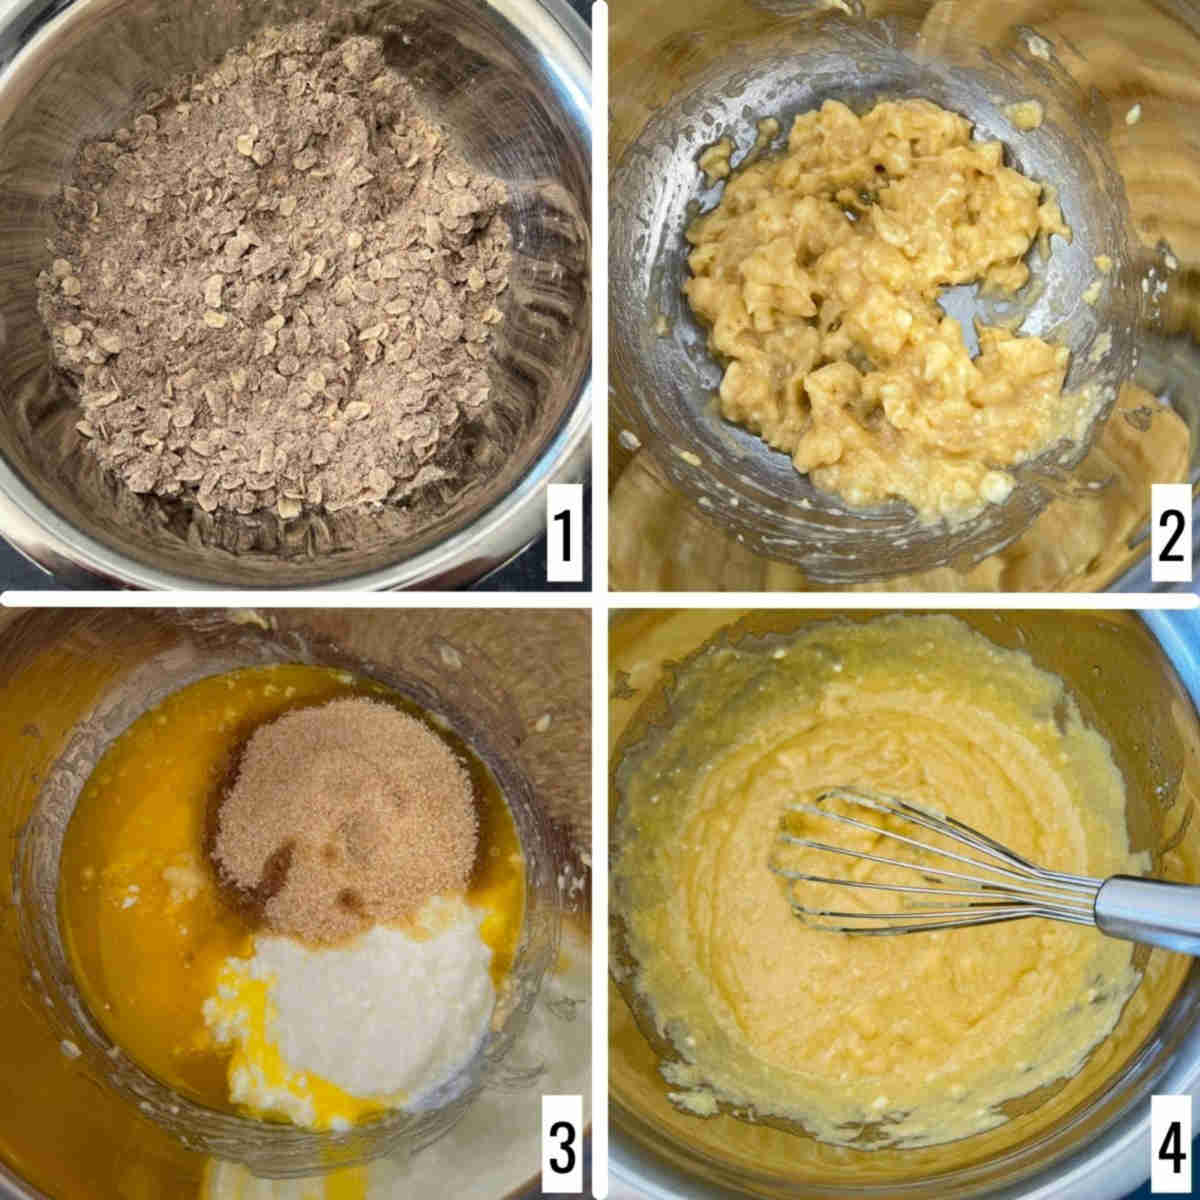
Step 1: In a mixing bowl, sift in the ragi flour. Combine it with oats, baking powder, baking soda, and salt. Mix it well and set it aside (image 1).
Step 2: In another large bowl, take bananas and mash them well using a fork or potato masher (image 2).
Step 3: To this, add melted butter, yogurt, and sugar. Whisk well until they are fully incorporated (images 3 and 4).
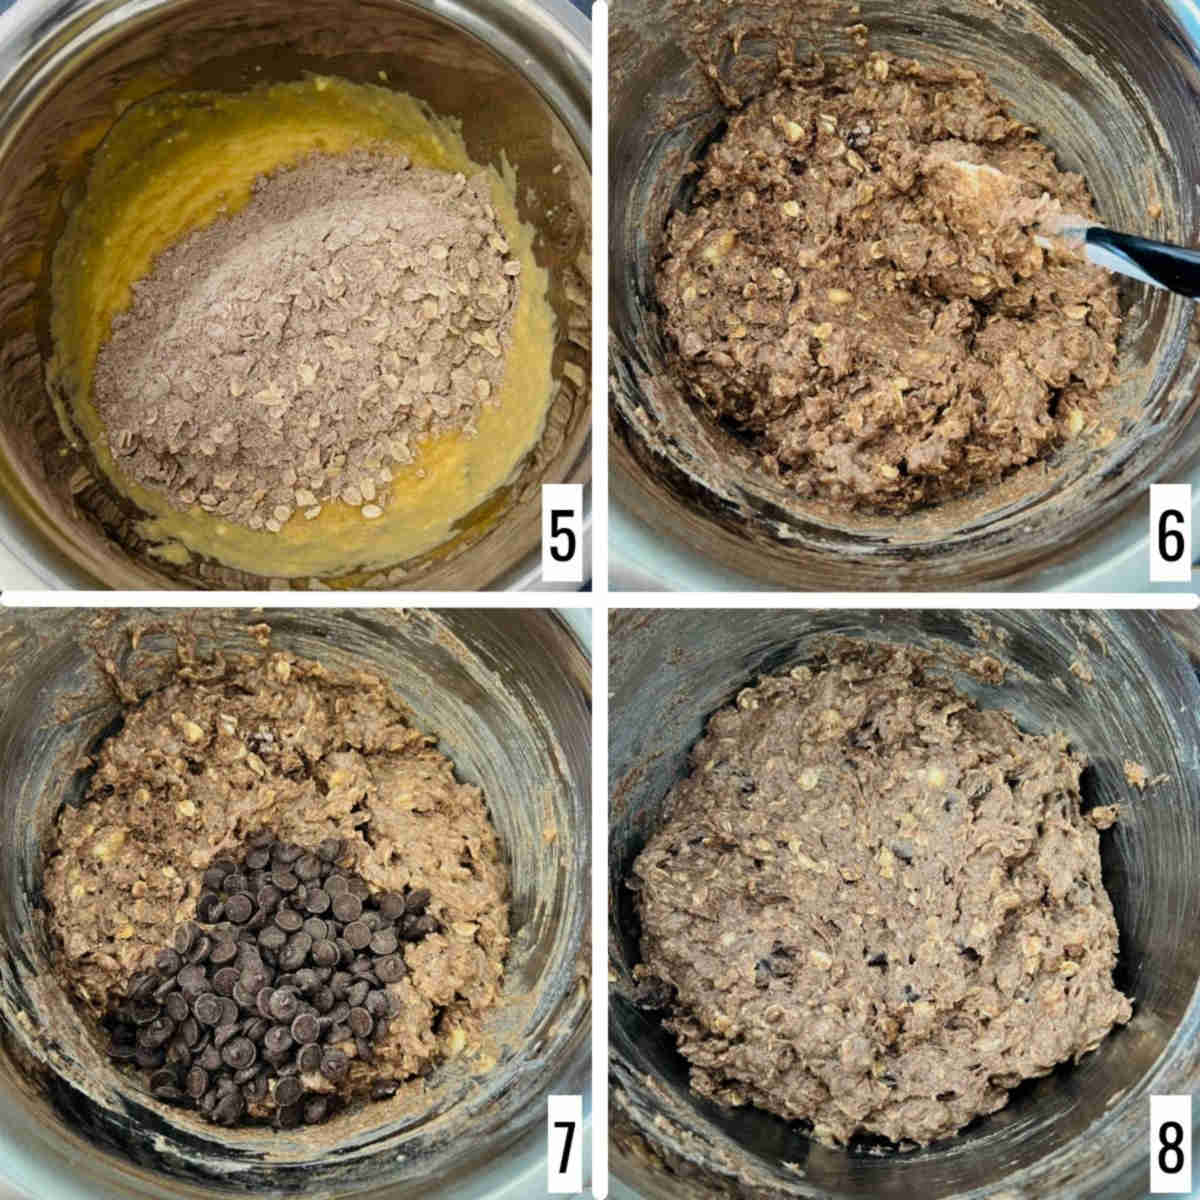
Step 4: Add this to the dry ingredients and mix gently (images 5 and 6).
Step 5: Fold in the chocolate chips gently (images 7 and 8).
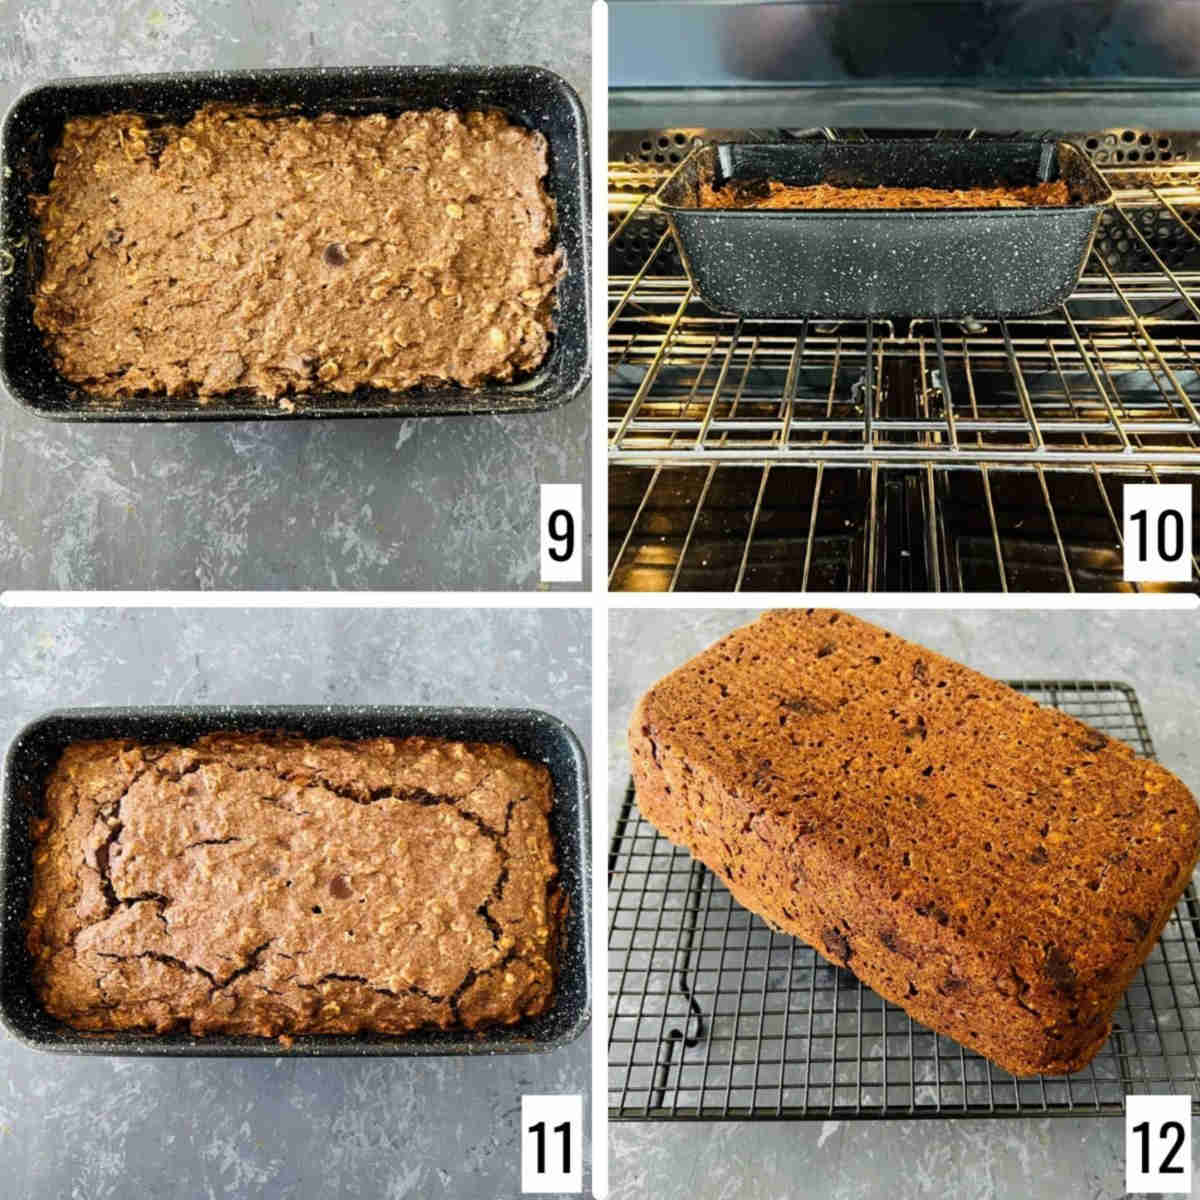
Step 6: Pour into the prepared tin. Bake in preheated oven (350 F / 180 C) for 25-30 minutes or until a skewer inserted in the center comes out clean (images 9 and 10).
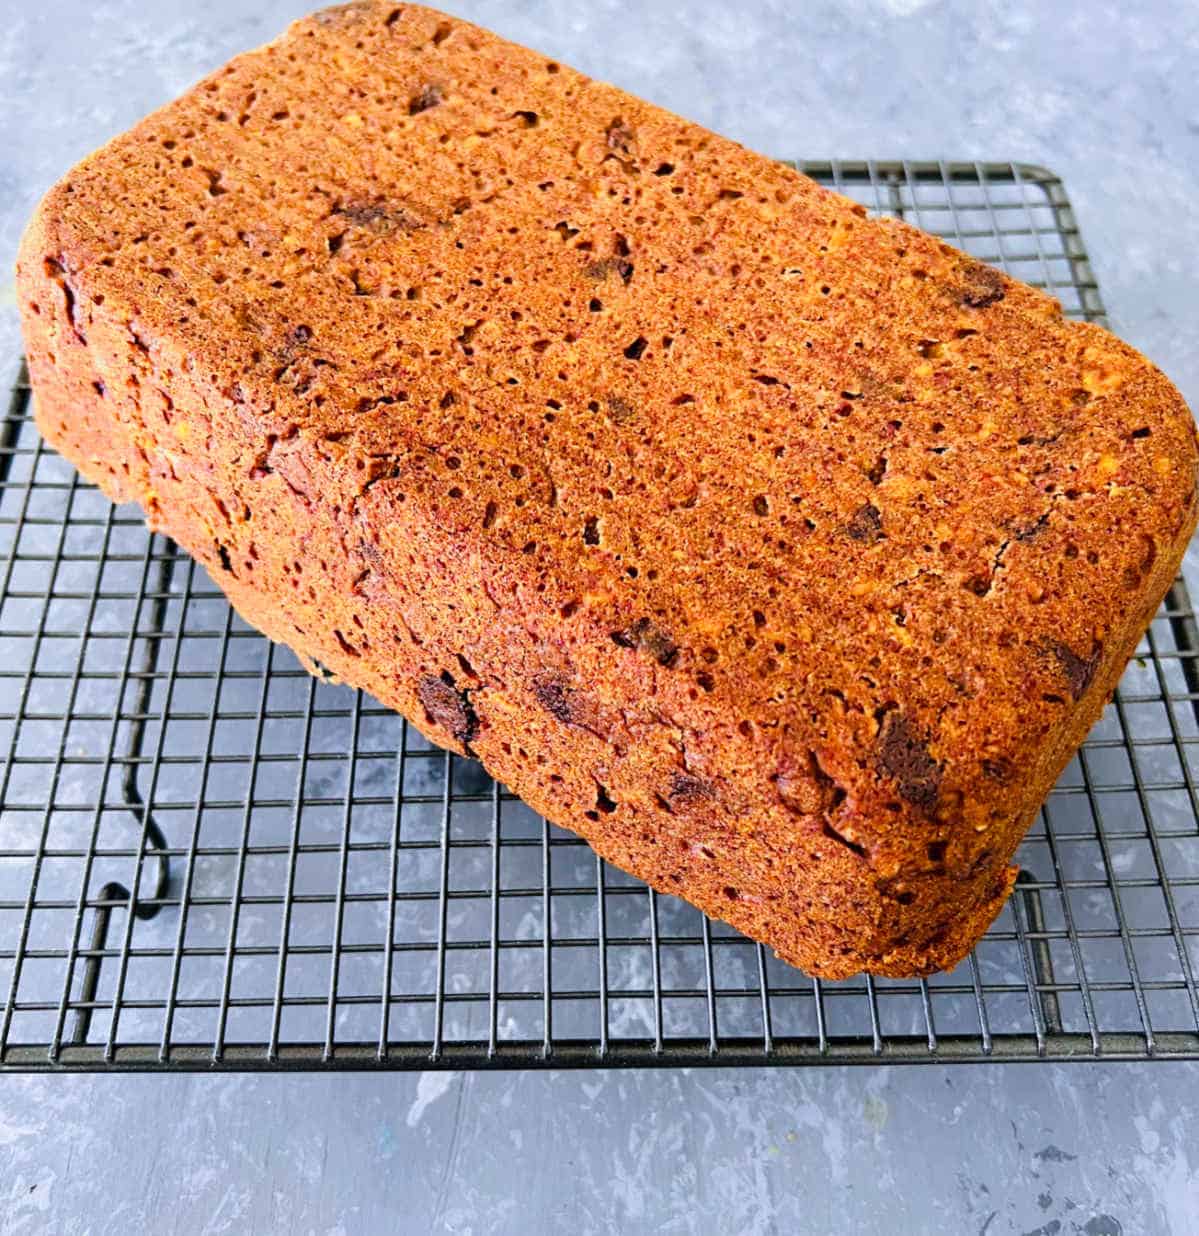
Step 7: Cool it in the baking tin for 10 minutes, then transfer it to a wire rack and cool it completely (images 11 and 12).
Expert Tips
Ragi flour can have a slightly coarse texture. To achieve a smoother batter, sift the ragi flour before adding it to the mixture.
Use ripe bananas with a soft texture and intense sweetness. Mash them thoroughly to create a smooth puree. This ensures a consistent flavor throughout the cake and helps in achieving a moist texture.
When combining the dry and wet ingredients, mix them just until they are incorporated. Overmixing can lead to a dense and tough cake. Stir the batter gently and avoid excessive stirring once the dry ingredients are added.
Recipe FAQs
To keep your ragi cake moist and tender, use ripe bananas. Avoid overmixing when combining wet and dry ingredients, and incorporate yogurt for tenderness. Adjust batter thickness by adding a liquid if needed.
For extended freshness when storing ragi cake, let it cool to room temperature. Use an airtight container for short-term storage at room temperature, or refrigerate it for up to a week. For longer storage, freeze the cake by wrapping it in plastic wrap and aluminum foil; it can be stored in the freezer for up to 2 months. When ready to enjoy, thaw it in the refrigerator or at room temperature.
More recipes using ragi


If you tried this Eggless Ragi Cake Recipe or any other recipe on my website, please leave a ? star rating and let me know how it went in the ? comments below.
Recipe card
Ragi Cake (Eggless Ragi Banana Cake)
Ingredients
- 1½ cups ragi flour
- 1 cup rolled oats
- ½ teaspoon baking soda
- 1 teaspoon baking powder
- 1 pinch salt
- 3 bananas overripe
- ¾ cup raw sugar
- ½ cup butter melted and cooled
- ½ cup yogurt
- 1 teaspoon vanilla extract
- ½ cup chocolate chip cookies
Instructions
- Preheat oven to 350 F (180 C). Grease a loaf tin with butter and set it aside.
- In a mixing bowl, sift in the ragi flour. To this, add oats, baking powder, baking soda, and salt. Mix everything well and set it aside.
- In another large bowl, take bananas and mash them well using a fork or potato masher.
- To this, add melted butter, yogurt, and sugar. Whisk well until they are fully incorporated.
- Add the dry ingredients to this and mix gently. Take care not to overmix the cake batter.
- Fold in the chocolate chips. Pour into the prepared tin.
- Bake in preheated oven for 25-30 minutes or until a skewer inserted in the center comes out clean.
- Cool it in the baking tin for 10 minutes, then transfer to a wire rack and cool completely.
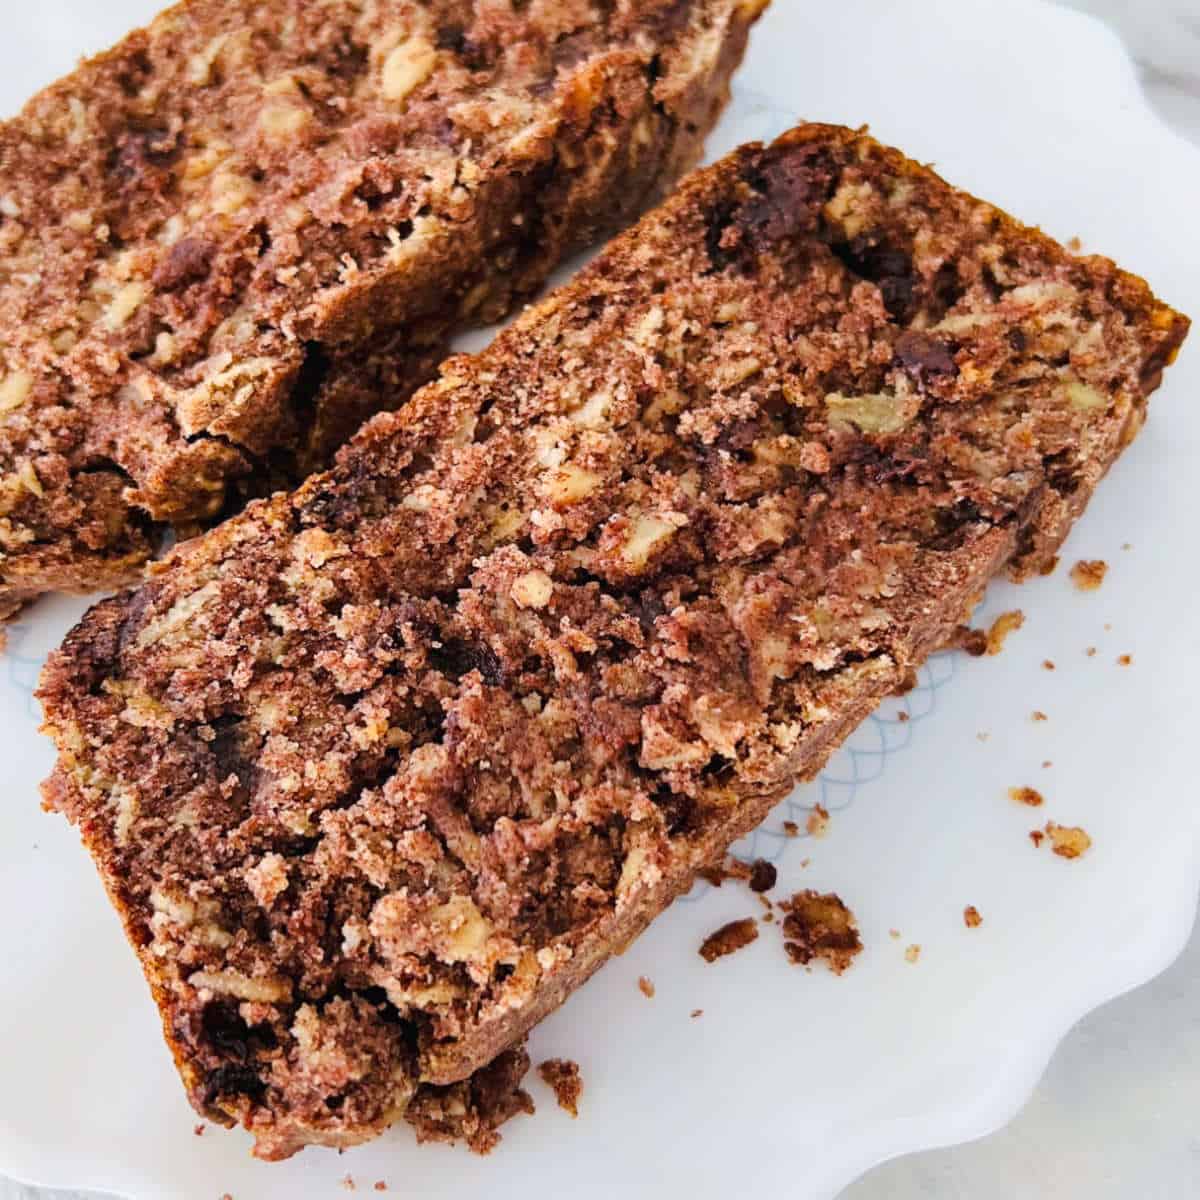
- Slice and serve.


Comments
No Comments