How to make sourdough starter
Learn how to make your own sourdough starter from scratch with this detailed recipe. With just two ingredients and some patience, you can create a naturally occurring yeast and bacteria culture that will give your sourdough bread its signature tangy flavor and chewy texture.
Servings: 2 cups of starter, approximately
Calories: 542kcal
Equipment
Ingredients
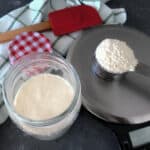
- 300 grams bread flour
- 300 grams filtered water
Instructions
DAY 1:
- Pour 100 grams of flour and 100 grams of water into a jar. Mix well making sure there are no bits of dry flour.
- Pop the lid loosely and let the jar sit in a warm spot away from direct sunlight for 24 hours.
DAY 2:
- Remove 100 grams of the starter from the jar and discard it.
- Add 50 grams of flour and 50 grams of water to the jar. Stir well to make sure there are no dry bits of flour. Place it back in the warm spot for the next 24 hours.
DAY 3:
- You will start to notice some bubbles on the top. This means that the yeast and bacterial activities have begun in the starter.
- Remove 100 grams of the starter from the jar and discard it.
- Add 50 grams of flour and 50 grams of water to the jar. Stir well to make sure there are no dry bits of flour. Place it back in the warm spot for the next 24 hours.
DAY 4:
- From day 4, you will need to feed your starter twice a day, 10 to 12 hours apart. Note the timing of your feed so that it is easy to track the next feeding time.
- In the morning, remove 100 grams of the starter from the jar and discard it.
- Add 50 grams of flour and 50 grams of water to the jar. Stir well to make sure there are no dry bits of flour. Place it back in the warm spot for the next 10-12 hours.
- After 10-12 hours, remove 100 grams of the starter from the jar and discard it.
- Add 50 grams of flour and 50 grams of water to the jar. Stir well to make sure there are no dry bits of flour. Place it back in the warm spot until the next day.
DAY 5:
- You will notice a lot of activity in your starter and it will start to rise with every feed. If it does not, give it a day or two more to mature.
- In the morning, remove 100 grams of the starter from the jar and discard it.
- Add 50 grams of flour and 50 grams of water to the jar. Stir well to make sure there are no dry bits of flour. Place it back in the warm spot for the next 10-12 hours.
- After 10-12 hours, remove 100 grams of the starter from the jar and discard it.
- Add 50 grams of flour and 50 grams of water to the jar. Stir well to make sure there are no dry bits of flour. Place it back in the warm spot until the next day.
DAY 6:
- Your starter is getting mature with every feed. Some starters are good to go by 6 or 7 days, while some need a few more days to mature and be ready to bake.
- In the morning, remove 100 grams of the starter from the jar and discard it.
- Add 50 grams of flour and 50 grams of water to the jar. Stir well to make sure there are no dry bits of flour. Place it back in the warm spot for the next 10-12 hours.
- After 10-12 hours, remove 100 grams of the starter from the jar and discard it.
- Add 50 grams of flour and 50 grams of water to the jar. Stir well to make sure there are no dry bits of flour. Place it back in the warm spot until the next day.
DAY 7:
- Your starter should be bubbly, active, and doubling every 6-8 hours after feeding. By day 7, your starter should be ready to bake; however, it will take a few more days to fully mature. If you are not planning to bake with it straight away, put it in the refrigerator and maintain it with weekly feeds.
Notes
Choose a warm location for your sourdough starter, such as a sunny window, near a heating vent, on the refrigerator, or in an oven with the light on. You can also use a bread-proofing box for consistency.
Opt for filtered or bottled water to make sourdough starter. If filtered water is unavailable, use boiled and cooled water.
Look for abundant bubbles and a slight, tangy smell. Perform a float test by dropping a teaspoon of starter into the water; if it floats, it's likely ready. However, a starter not passing the float test can still yield good results. Additionally, check for a doubled volume, a strong sign that your starter is ready for baking after 10-15 days.
Nutrition
Calories: 542kcal | Carbohydrates: 109g | Protein: 18g | Fat: 2g | Saturated Fat: 0.4g | Polyunsaturated Fat: 1g | Monounsaturated Fat: 0.2g | Sodium: 11mg | Potassium: 150mg | Fiber: 4g | Sugar: 0.5g | Vitamin A: 3IU | Calcium: 27mg | Iron: 1mg